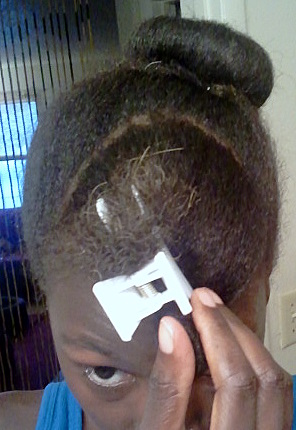
Showing posts with label Blow Drier. Show all posts

Thursday, March 29, 2012

Style Quickie: Two Strand Twists on Blown out Hair

I realized I've been straying away from the hair challenge that I signed up for last year!!! One of the points is to do protective styles to promote length retention. So from here out, I'll be making conscious efforts to stay away from puffs, wash n go's, and other loose styles.

It's been almost a week since I co washed and styled my hair. I really wanted to try a new heat protectant I bought, but didn't want to flat iron my hair. The style that popped in my mind was two strand twists on blown out hair.

~~~~~~~~~~
I blow dried my hair about 80% of the way, making sure the roots were the most dry. I also avoided putting too much heat on the ends of my hair. After sectioning my head I began twisting in the back of my head. The twists in the back are randomly placed. When I worked on the front section I twisted with more order. I chose this method so that the front section could cover up any gaps or un-uniform twists in the back.
~~~~~~~~~~
Products Used:
  • Vo5 Conditioner
  • Heat Protectant
  • Oils (I mixed in a bottle) coconut oil, grape seed oil, sweet almond oil
  • My shea coconut butter mixture
  • Water (to hold the ends of my hair)


Notes that helped me:
  • While twisting the back I would occasionally look in a mirror to make sure I wasn't making the twists too big. If there was too much space in between twists I just divided the over sized one in half.
  • The front section of my hair, in general, becomes loose over time easier than the back of my head. To curb this, I made these twists smaller than the twists in the back.
  • Once there was about a half inch from the end of my hair I'd dip my finger in water, and then continue to twist. To protect my ends I twisted as far as I could, and then twirled the twisted end with my wet finger. This made the end curl, and hold without the use of any gels.
  • To get the twists to lay a certain way in the front I parted the front section before I began twisting. I made sure the twists stayed on their side of the part while I styled.
  • Last time I did this style I noticed a lot of gaps in the back of my head that weren't caught in the styling process. To avoid this, I'd grab a mirror and check while styling the front. Adjusting as needed helped eliminate this.

At night there are a couple of options to help preserve your hair and this style.
  1. Wearing a satin scarf or bonnet can help without drying out your twists
  2. Using a satin pillow case so moisture isn't absorbed from your hair
I didn't want to risk flattening my twists too much, so I opted for the satin pillow case. In the past this was sufficient for me.


Since the scalp is exposed more than usual with a style like this, it can become dry. For me, a dry scalp and an itchy scalp go hand in hand! At night, I'll use my oil mixture and massage it into my scalp. After rubbing the mixture in my hands I'll gently massage it into the twists themselves -- concentrating on the ends. This can be done as needed.

I may try out a couple different styles for these twists. Whenever I feel like I need a change I'll wear this style in a twist out before washing and restyling! I'll be sure to post pictures in the "Hair I Did" album on Facebook, so be sure to check it out!! If you have any pictures of styles that you've done yourself -- post them on the wall and they'll be added!

Follow me on http://www.twitter.com/mzdezy

Sunday, December 4, 2011

Video: Warning High Heat!


Warning: High Heat!

How do you protect your hair from heat damage?? Do you have any horror stories? I know I do!! One of the worst things that I've don't to my hair was trying to hot comb it. The comb was way too hot and burned right through my hair. The section was on the crown of my head. so there was no hiding it. About two inches of hair was left. Terrible!! Learned my lesson with that! You can learn more about heat damage H E R E!!

Share your stories on my Facebook Fan Page wall! H E R E!!

Friday, November 25, 2011

Style Quickie: Sock Bun

I was looking through some older pictures and came across ones I took while styling sock buns. There is an older post on this style I wore, and you can watch the YouTube video that inspired me. The link for the video is under the "links" tab at the top.

Products Used:
  1. Peppermint Shampoo by Dark and Lovely Naturally
  2. Wave Moisturize by Dark and Lovely Naturally
  3. Leave-in Conditioner by Motions

The products that I used can be found at local beauty supply stores, or even drug stores. They were about $5 each. I love this shampoo! Peppermint stimulates blood circulation in the scalp, and you can feel it working. My hair is soft afterward, smells great, and is tangle free. The wave moisturizer smells great and a little goes a long way. When doing twists the moisturizer helps to keep them from unraveling. The leave-in conditioner is a great go to product. It's inexpensive, works well, and lasts a long time. It leaves your hair feeling moisturized, soft, and easy to manage.


Tools Used:

Rat Tail Comb to help make large parts & Large Tooth Comb to help detangle 
Elastics to make pony tails for the buns & Clips to hold extra hair out of the way. You may also need a bobby pin or two.

Styling:

After washing, applying product, and sectioning hair I begin to blow dry it

All that hair!! I hardly ever blow dry it, so I didn't realize how much it had grown!

I ended up with 3 sections for this style. They're all completely optional and you can change it up! You can have 3 buns if you'd like, make the 3 the same size, do something different in the front besides two strands....endless possibilities! An elastic is used initially to make 2 ponytails with the middle and bottom sections.

The front section is clipped out of the way. In the end, this will be twisted into small two strands. 


The rolled sock is placed over the ponytail. You do this just as if the sock was an elastic.

This part was easier to do if I had an elastic on my wrist before grabbing the hair. You want to fold the hair down and around the sock. Make sure  the sock is covered evenly on all sides with your hair. Next, secure the hair with the elastic that's around your wrist. There may be pieces of hair that are sticking out from under the elastic. That's fine! Roll that hair under as if doing a big twist. Continue around the bun, then secure the end with a bobby pin.

I ended up with one big bun in the middle and a small one at the bottom.


The front section was then twisted into small two strands. I used the wave moisturizer for this part. 

Completed two strands!

I pulled the twists up and secured them with a hair comb. You can leave them down, secure up with a bobby pin, or other hair piece. You can be creative here!
SUGGESTION: See the white showing on my top bun? I'd suggest using a black sock, because of this. If you do have small gaps it won't be noticeable.

SUGGESTION: If a hair elastic is too thick/big for your hair try using a small rubber band to make the initial ponytail. That's what I ended up doing for the smallest bun in the very back.

To see another way I wore my sock buns check out an older post H E R E !!


Sock Buns are:
  • easy updos
  • good styles for transitioners
  • quick
  • easy to switch from casual to more formal
  • nice protective styles


~~ Do you have any variations of this style? Show me!! ~~


Don't forget to Like my Facebook Fan Page!! Follow me on Twitter @MzDezy

Sunday, October 30, 2011

MzDezyB on YouTube!

YouTube is a site that I've learned a lot from--both good and bad. It helped me learn how to do flat two strand twists, reconstruct my own t-shirts, make flax seed gel, that there reallyare people in the world who put bacon on everything, the latest dance moves to avoid at all costs, and more! I had no idea how challenging it could be to make my own video for YouTube!! So far I have two made!!! The first was the most difficult, but I made it. Check them out, subscribe to my channel, let me know what you think, and keep your eye out for more!!

Tuesday, September 13, 2011

Dandruff vs. Dry Scalp

Did you know that there's a difference between having a dry scalp and having dandruff? There is, and other scalp conditions are often mistaken for having dandruff.

Since skin cells are so small, most of the time your skin cells are replaced, or flake off without you noticing. There are a number of things that can cause skin cells to shed more often in large oily patches. These patches are what make a difference between dandruff and dry scalp.

Some Causes of Dandruff:
  • Allergies to hair products, or their ingredients
  • Some medications can have a side effect of dandruff
  • Eczema, psoriasis, and other dermatitis can cause a form of dandruff
  • A fungus called Malassezia
  • Certain illnesses such as Parkinson's disease
  • Having a compromised immune system
Some Causes of Dry Scalp:
  • Washing your hair with hard water can remove needed oils and moisture
  • Being dehydrated or not eating right can effect your oil glands in your scalp
  • Over blow drying, using curling irons, flat irons, and other heated hair tools
  • Over using shampoos, or using ones that contain sulfates (read the ingredients)
  • Over using hair products that have harsh chemicals such as a high alcohol content
  • Simply dry weather

~~~~~~~~~~~~~~~~~~~~~~~~~~~~~~

Dry Scalp


VS.


Dandruff

~~~~~~~~~~~~~~~~~~~~~~~~~~~~~~


What is dandruff??

Dandruff is a mixture of dead skin cells, and sebum (oil) clumped together. It usually has a yellow tint to it and can be flaky. In severe cases there's actual scalp tissue, bacteria, and/or fungus in the mix too.

~~~~~~~~~~~~~~~~~~~~

What is dry scalp??

Dry scalp is dehydrated and/or shedding dead skin cells. It usually is white in color and flaky.


~~~~~~~~~~~~~~~~~~~~~~~~~~~~~~


Need Help with Dry Scalp?
  • Drink plenty of water. It'll help keep your skin (scalp) hydrated.
  • Don't wash your hair daily
  • Minimize the use of heated hair tools, or use cool air to if you must blow dry
  • Use a shampoo that's specialized for dry scalp
  • Try a hot oil treatment of coconut, olive, or caster oil!!!
  • Use essential oils such as: tea tree, rosemary, or peppermint, which all help dry scalp
Need Help with Dandruff?
  • Try a specialized shampoo that's sulfur, tar, or zinc based
  • In extreme cases prescription steroid creams are helpful
  • Use lukewarm water to wash hair so no further damage is done to the scalp
  • Identify allergens and irritants of your skin, then avoid them if possible
  • If all else fails, it may be time to visit a dermatologist
  • Stressed? Try to relax. Stress can cause oil glands to go out of whack. Either producing too much oil (causing pimples) or not producing enough (irritating current conditions)

~~~~~~~~~~~~~~~~~~~~~~~~~~~~~~


I've never had to personally deal with dandruff. Knock on wood that I won't have to. Dry scalp is a different story! My favorite way to deal with dry scalp is to use hot oil treatments!! I have a few concoctions that I pull out, so be on the watch for that!!

Also don't forget to subscribe and/or follow me   ^_~"   You can now subscribe by simply typing your email into the box at the top and hitting submit!!!

Thursday, September 1, 2011

Warning: High Heat

Did you know.... that using a heated hair tool that's too hot can permanently damage your hair after just one use?? Yep, it's true! This damage causes the cuticle to stay straight and not return to its curly state even after many washes.

Did you know.... that your hair can literally boil from heated hair tools if they're not properly used? When this happens the keratin softens and can explode.

Magnified you can see the heat damage--bubbles were caused
Image from: pgbeautygroomingscience.com

~~~~~~~~~~~~~~~~~~~~~~~~~~~~~~

The 1st piece of hair gets the tool when it's at its hottest and in its most damaging state!!
Example of heat damage from a styling tool--courtesy of my cousin
 Did you know.... that different hair types (straight, curly, wavy, and thin, etc.) have temperature limits when it comes to heat?

Do you use the suggested amount of heat? Too much, too little?
Image from: Folica.com

Did you know.... that the smoke you see while blow drying is actually moisture evaporating from your hair! This can cause serious damage that can't be repaired.

Image from: wikipedia.com

~~~~~~~~~~~~~~~~~~~~~~~~~~~~~~


Photos of Heat Damage:


Magnified Split Ends
How to fix--cut them off! If you ignore
them, they can travel up the hair shaft.

THIS is what my patch of hair looked like when I tried to hot comb it!!!
The only difference was that the damaged remains were in the crown of my head. There was NO hiding them!


Healthy hair over length! If you focus on the over all
health; the length will come.

Over processing your hair with chemicals can result in the same damage as putting too much heat on it!


****TIPS****
~~Always flat iron clean and conditioned hair! This can help minimize possible damage.

~~It's best to towel dry your hair as much as possible before blow drying. Blow dry on medium-low heat.

~~Invest in a good flat iron. The money spent is well worth the protection and outcome of your hair!!

~~Always use heating tools that YOU can control the temperature of! Off-On buttons aren't going to cut it.


~~~~~~~~~~~~~~~~~~~~~~~~~~~~~~


Ways to Protect Your Hair:
  • Check to see if the flat iron you bought also has heat protecting products
  • Use the lowest recommended setting to begin
  • Recognize different textures (if any) in your hair. Different sections may need different amounts of heat
  • Never style wet hair!! Make sure your hair is 100% dry
  • Use shampoos/conditioners that assist in straight styles. That way you won't have to apply heat daily
  • Blow dry/flat iron in sections. Smaller sections will need less time under heat vs. a thick section
  • If heat's a must--deep condition weekly to prevent damage
  • When possible--air dry your hair
  • Try heat activated products
  • Follow the directions that actually come with your styling tools

~~~~~~~~~~~~~~~~~~~~~~~~~~~~~~


You shouldn't be afraid of heat, or avoid it completely. With all things, moderation, information, and protection are the key!! At least in theory right ^_^  Me personally, I use a flat iron, and blow drier, but on rare occasions. It only takes one time for damage to be done though! There are ways to help protect your hair against the heat of styling tools.

Heat can also be a positive thing for you hair. When conditioning, the reason it's advised to rinse with lukewarm water, or to wear a warm towel/shower cap, is because of the heat. Heat "opens up" your hair allowing for the conditioner to be absorbed. If the heat source is too hot, yes damage may be done.

Are there any products that you use to help prevent heat damage?

Have you had to deal with damage done by you, or a stylist??

Is there a brand of styling tools you'd recommend???

Comment below!!!