Showing posts with label Whipped Shea Butter. Show all posts

Thursday, March 29, 2012

Style Quickie: Two Strand Twists on Blown out Hair

I realized I've been straying away from the hair challenge that I signed up for last year!!! One of the points is to do protective styles to promote length retention. So from here out, I'll be making conscious efforts to stay away from puffs, wash n go's, and other loose styles.

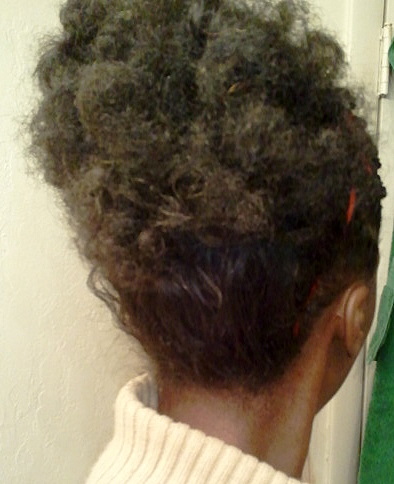
It's been almost a week since I co washed and styled my hair. I really wanted to try a new heat protectant I bought, but didn't want to flat iron my hair. The style that popped in my mind was two strand twists on blown out hair.

~~~~~~~~~~
I blow dried my hair about 80% of the way, making sure the roots were the most dry. I also avoided putting too much heat on the ends of my hair. After sectioning my head I began twisting in the back of my head. The twists in the back are randomly placed. When I worked on the front section I twisted with more order. I chose this method so that the front section could cover up any gaps or un-uniform twists in the back.
~~~~~~~~~~
Products Used:
  • Vo5 Conditioner
  • Heat Protectant
  • Oils (I mixed in a bottle) coconut oil, grape seed oil, sweet almond oil
  • My shea coconut butter mixture
  • Water (to hold the ends of my hair)


Notes that helped me:
  • While twisting the back I would occasionally look in a mirror to make sure I wasn't making the twists too big. If there was too much space in between twists I just divided the over sized one in half.
  • The front section of my hair, in general, becomes loose over time easier than the back of my head. To curb this, I made these twists smaller than the twists in the back.
  • Once there was about a half inch from the end of my hair I'd dip my finger in water, and then continue to twist. To protect my ends I twisted as far as I could, and then twirled the twisted end with my wet finger. This made the end curl, and hold without the use of any gels.
  • To get the twists to lay a certain way in the front I parted the front section before I began twisting. I made sure the twists stayed on their side of the part while I styled.
  • Last time I did this style I noticed a lot of gaps in the back of my head that weren't caught in the styling process. To avoid this, I'd grab a mirror and check while styling the front. Adjusting as needed helped eliminate this.

At night there are a couple of options to help preserve your hair and this style.
  1. Wearing a satin scarf or bonnet can help without drying out your twists
  2. Using a satin pillow case so moisture isn't absorbed from your hair
I didn't want to risk flattening my twists too much, so I opted for the satin pillow case. In the past this was sufficient for me.


Since the scalp is exposed more than usual with a style like this, it can become dry. For me, a dry scalp and an itchy scalp go hand in hand! At night, I'll use my oil mixture and massage it into my scalp. After rubbing the mixture in my hands I'll gently massage it into the twists themselves -- concentrating on the ends. This can be done as needed.

I may try out a couple different styles for these twists. Whenever I feel like I need a change I'll wear this style in a twist out before washing and restyling! I'll be sure to post pictures in the "Hair I Did" album on Facebook, so be sure to check it out!! If you have any pictures of styles that you've done yourself -- post them on the wall and they'll be added!

Follow me on http://www.twitter.com/mzdezy

Saturday, November 26, 2011

Style Quickie: Twists & Poof

For the longest time I've been so against doing mini twists on myself. The time it takes to complete them is really the sole reason for not wanting to do them. I began this style with full intentions of doing mini twists. As you can see that didn't happen. This style turned out nice anyways!


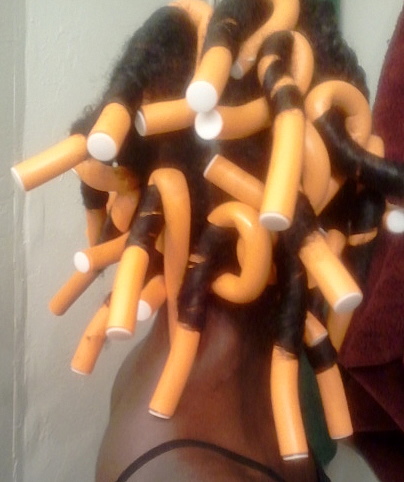
As always I started with a freshly washed head of hair. I used was my whipped shea butter mix, and essential oil water mix when my hair dried faster than I could style. On one side I put a few flat two strand twists, then bobby pinned out of the way while I two strand twisted the front of my head. Once that was completed, I had no motivation to twist anymore hair! I wasn't sure what else I wanted to do with it, but I didn't want it to take all day. Flexi rods to the rescue!! I still haven't mastered flexi rods on wet curly hair yet, so the results weren't perfect. Some curls were perfect, and some had frizzy ends. Over all the look wasn't terrible.


A high poof is what became of the flexi rod curls!

A nice headband added, and I'm off to work!


My poof was held in place with a few bobby pins. I wore this style for about 5 days before taking out the flat two strand twists. To wash, and to keep my two strands in tact, I clipped them together. The back and sides of my head I washed as normal, then gently cleaned my scalp where the two strand twists were.

I've washed my hair about three times since the style was first started. In the back of my mind I was still swearing off mini twists. Didn't work though, by the end of the weekend I'll have a full head of mini twists. Stay tuned for pictures!


Other Ways I Styled:

~~ After washing I did medium twists all over, let air dry, then wore a twist out with the two strands in front
~~ Slept with flexi rods on the two strands to give them some curl, and paired with the twist out
~~ Wore a poof and added a large hair flower to the side of it, and wore the two strands as curly bangs
~~ Rolled the loose hair into a french roll, then added a flower. The two strands were swooped to one side


** News **

I finally got my Etsy Shop open for business!!!! Does anyone else have a shop? Share your links!

Monday, October 24, 2011

Coconut Oil

My latest venture was making whipped shea butter with coconut oil! I love shea butter, coconut oil, and essential oils, so why not make something great out of all of them? This time around I made sure to take pictures of the process.


What I Used:
~~~~~~~~~~~~~~~~~~~~~~~~~~~~~~

Using a double boiler, on a medium heat I melt the shea butter and coconut oil. About two parts raw unrefined shea butter was used to about one part organic extra virgin coconut oil. It takes a few seconds for it to melt completely. That's fine, because I don't want to cook the oils; I just want them melted.

Once the majority of the shea butter and coconut oil is melted I turn the heat down to low. Using a plastic knife I gently stirred the remaining chunks until melted. After completely melting, I add in Vitamin E Oil, Olive Oil, and Carrot Oil. It looks like popcorn oil.

~~~~~~~~~~~~~~~~~~~~~~~~~~~~~~

Next, it's time to cool the oil down to stop the cooking process, and so that it may be whipped! I put the entire pot into the freezer for about 3 minutes. After removing, I use a hand mixer (on a medium setting) to whip the oils together.


I mixed the oils for about 3 minutes before returning the pot to the freezer. In the beginning you'll notice that the mixture returns to its liquid state. The friction caused by the mixer reheats the oil, so the process of mixing/chilling has to be repeated a few times.

Soon you'll see froth on top of the oils. This is caused by the air forced into the oils by the mixer. You want to see this; it's what will make the whipped product light and fluffy.

~~~~~~~~~~~~~~~~~~~~~~~~~~~~~~

After repeating this process a few times the mixture will start to thicken up.


At this point you want to start paying extra attention to your mixture. Keep blending, but cut the time in the freezer down so you don't over chill the mix. It'll remind you for a watery pancake batter. If you want a more airy product set the blender speed to high. This will force more air into the oils.

~~~~~~~~~~~~~~~~~~~~~~~~~~~~~~

Now is when I add in any EO that I plan on using. For this mixture I used about 6 drops of Lemon EO and about 30 drops of Lavender EO before blending. Smell the whipped mix, and if the scent isn't to your liking adjust the number of drops you use.


When you see a "skin" forming on the top after putting in the freezer you no longer need to chill the mixture. Continue to blend until you reach a consistency that you like. Keep in mind that the mixture will solidify a little more after it completely chills.

~~~~~~~~~~~~~~~~~~~~~~~~~~~~~~

When the shea butter-coconut oil mixture starts to look like a body butter, or thick lotion I stop blending. This is the consistency I desire. If you keep blending the result will be more airy and solid. Stopping here gives you a creamier product. In the end both ways will melt at body temperature.


~~~~~~~~~~~~~~~~~~~~~~~~~~~~~~

Using my plastic knife I scrape in my whipped shea butter into small glass jars with air tight lids. A piping bag (like bakers use) could be used to help transfer the whipped shea butter into containers.


As you can probably tell, the results resemble a lotion. The consistency will vary depending on the air temperature. The amount of coconut oil you use will help determine this. If stored in a cool place it'll remain soft, but solid.

~~~~~~~~~~~~~~~~~~~~~~~~~~~~~~

Pros of this Mix:
  • The acid in Lemon EO will help seal the hairs cuticle trapping in moisture
  • Lemon EO acts as a clarifier to your hair helping to remove excess product and add shine
  • Lavender EO is great for dry, oily, or damaged hair, because it helps normalize natural oil production
  • Both Lemon EO and Lavender EO help fight the causes of dandruff.
  • Coconut oil melts at about 75 degrees, so your natural body temp helps it spread. Less product needed
  • Coconut oil is a natural antimicrobial
  • Shea butter and coconut oil are both great hair and skin conditioners
  • Shea butter has many healing properties
  • Shea butter is quickly absorbed by the skin
  • Carrot oil is high in antioxidants that help fight hair loss
  • Olive oil helps improve elasticity (how far hair can stretch before breaking) of dry hair
  • The whipped mix isn't as thick as raw shea butter, so people who were turned off by that have a new alternative

Uses for this Mix:

There are a few samples of my whipped shea butter mixtures floating around out there. Hopefully soon I'll have a couple reviews back on it. Try to create your own mixes. What would you use??