Showing posts with label Two Strand Twists. Show all posts

Thursday, March 29, 2012

Style Quickie: Two Strand Twists on Blown out Hair

I realized I've been straying away from the hair challenge that I signed up for last year!!! One of the points is to do protective styles to promote length retention. So from here out, I'll be making conscious efforts to stay away from puffs, wash n go's, and other loose styles.

It's been almost a week since I co washed and styled my hair. I really wanted to try a new heat protectant I bought, but didn't want to flat iron my hair. The style that popped in my mind was two strand twists on blown out hair.

~~~~~~~~~~
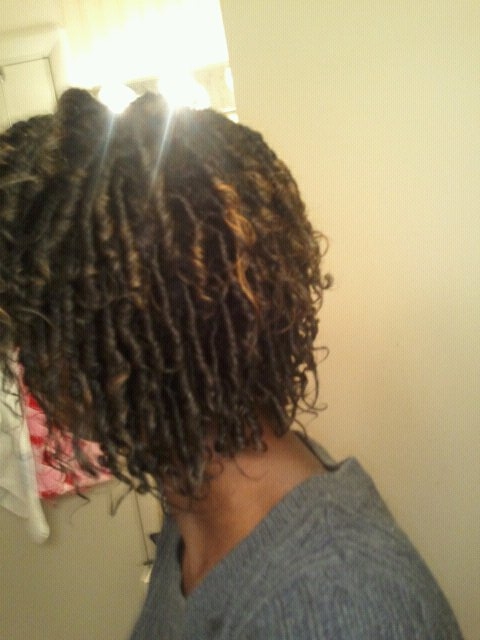
I blow dried my hair about 80% of the way, making sure the roots were the most dry. I also avoided putting too much heat on the ends of my hair. After sectioning my head I began twisting in the back of my head. The twists in the back are randomly placed. When I worked on the front section I twisted with more order. I chose this method so that the front section could cover up any gaps or un-uniform twists in the back.
~~~~~~~~~~
Products Used:
  • Vo5 Conditioner
  • Heat Protectant
  • Oils (I mixed in a bottle) coconut oil, grape seed oil, sweet almond oil
  • My shea coconut butter mixture
  • Water (to hold the ends of my hair)


Notes that helped me:
  • While twisting the back I would occasionally look in a mirror to make sure I wasn't making the twists too big. If there was too much space in between twists I just divided the over sized one in half.
  • The front section of my hair, in general, becomes loose over time easier than the back of my head. To curb this, I made these twists smaller than the twists in the back.
  • Once there was about a half inch from the end of my hair I'd dip my finger in water, and then continue to twist. To protect my ends I twisted as far as I could, and then twirled the twisted end with my wet finger. This made the end curl, and hold without the use of any gels.
  • To get the twists to lay a certain way in the front I parted the front section before I began twisting. I made sure the twists stayed on their side of the part while I styled.
  • Last time I did this style I noticed a lot of gaps in the back of my head that weren't caught in the styling process. To avoid this, I'd grab a mirror and check while styling the front. Adjusting as needed helped eliminate this.

At night there are a couple of options to help preserve your hair and this style.
  1. Wearing a satin scarf or bonnet can help without drying out your twists
  2. Using a satin pillow case so moisture isn't absorbed from your hair
I didn't want to risk flattening my twists too much, so I opted for the satin pillow case. In the past this was sufficient for me.


Since the scalp is exposed more than usual with a style like this, it can become dry. For me, a dry scalp and an itchy scalp go hand in hand! At night, I'll use my oil mixture and massage it into my scalp. After rubbing the mixture in my hands I'll gently massage it into the twists themselves -- concentrating on the ends. This can be done as needed.

I may try out a couple different styles for these twists. Whenever I feel like I need a change I'll wear this style in a twist out before washing and restyling! I'll be sure to post pictures in the "Hair I Did" album on Facebook, so be sure to check it out!! If you have any pictures of styles that you've done yourself -- post them on the wall and they'll be added!

Follow me on http://www.twitter.com/mzdezy

Saturday, November 26, 2011

Style Quickie: Twists & Poof

For the longest time I've been so against doing mini twists on myself. The time it takes to complete them is really the sole reason for not wanting to do them. I began this style with full intentions of doing mini twists. As you can see that didn't happen. This style turned out nice anyways!


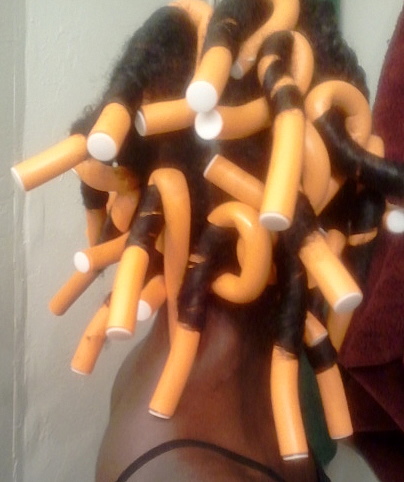
As always I started with a freshly washed head of hair. I used was my whipped shea butter mix, and essential oil water mix when my hair dried faster than I could style. On one side I put a few flat two strand twists, then bobby pinned out of the way while I two strand twisted the front of my head. Once that was completed, I had no motivation to twist anymore hair! I wasn't sure what else I wanted to do with it, but I didn't want it to take all day. Flexi rods to the rescue!! I still haven't mastered flexi rods on wet curly hair yet, so the results weren't perfect. Some curls were perfect, and some had frizzy ends. Over all the look wasn't terrible.


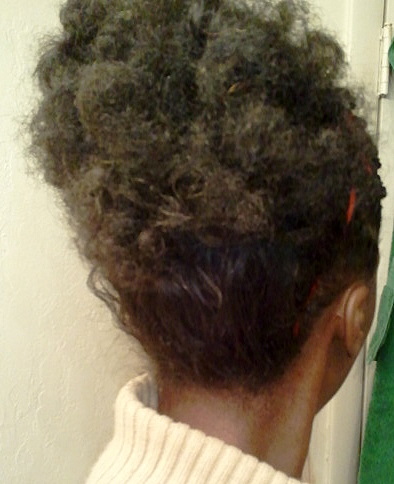
A high poof is what became of the flexi rod curls!

A nice headband added, and I'm off to work!


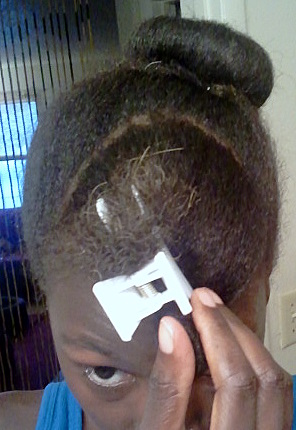
My poof was held in place with a few bobby pins. I wore this style for about 5 days before taking out the flat two strand twists. To wash, and to keep my two strands in tact, I clipped them together. The back and sides of my head I washed as normal, then gently cleaned my scalp where the two strand twists were.

I've washed my hair about three times since the style was first started. In the back of my mind I was still swearing off mini twists. Didn't work though, by the end of the weekend I'll have a full head of mini twists. Stay tuned for pictures!


Other Ways I Styled:

~~ After washing I did medium twists all over, let air dry, then wore a twist out with the two strands in front
~~ Slept with flexi rods on the two strands to give them some curl, and paired with the twist out
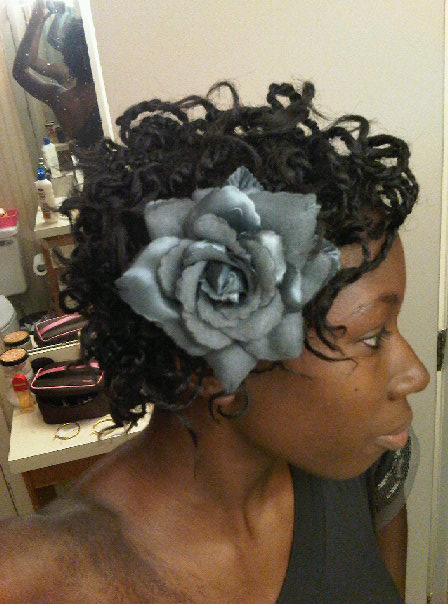
~~ Wore a poof and added a large hair flower to the side of it, and wore the two strands as curly bangs
~~ Rolled the loose hair into a french roll, then added a flower. The two strands were swooped to one side


** News **

I finally got my Etsy Shop open for business!!!! Does anyone else have a shop? Share your links!

Friday, November 25, 2011

Style Quickie: Sock Bun

I was looking through some older pictures and came across ones I took while styling sock buns. There is an older post on this style I wore, and you can watch the YouTube video that inspired me. The link for the video is under the "links" tab at the top.

Products Used:
  1. Peppermint Shampoo by Dark and Lovely Naturally
  2. Wave Moisturize by Dark and Lovely Naturally
  3. Leave-in Conditioner by Motions

The products that I used can be found at local beauty supply stores, or even drug stores. They were about $5 each. I love this shampoo! Peppermint stimulates blood circulation in the scalp, and you can feel it working. My hair is soft afterward, smells great, and is tangle free. The wave moisturizer smells great and a little goes a long way. When doing twists the moisturizer helps to keep them from unraveling. The leave-in conditioner is a great go to product. It's inexpensive, works well, and lasts a long time. It leaves your hair feeling moisturized, soft, and easy to manage.


Tools Used:

Rat Tail Comb to help make large parts & Large Tooth Comb to help detangle 
Elastics to make pony tails for the buns & Clips to hold extra hair out of the way. You may also need a bobby pin or two.

Styling:

After washing, applying product, and sectioning hair I begin to blow dry it

All that hair!! I hardly ever blow dry it, so I didn't realize how much it had grown!

I ended up with 3 sections for this style. They're all completely optional and you can change it up! You can have 3 buns if you'd like, make the 3 the same size, do something different in the front besides two strands....endless possibilities! An elastic is used initially to make 2 ponytails with the middle and bottom sections.

The front section is clipped out of the way. In the end, this will be twisted into small two strands. 


The rolled sock is placed over the ponytail. You do this just as if the sock was an elastic.

This part was easier to do if I had an elastic on my wrist before grabbing the hair. You want to fold the hair down and around the sock. Make sure  the sock is covered evenly on all sides with your hair. Next, secure the hair with the elastic that's around your wrist. There may be pieces of hair that are sticking out from under the elastic. That's fine! Roll that hair under as if doing a big twist. Continue around the bun, then secure the end with a bobby pin.

I ended up with one big bun in the middle and a small one at the bottom.


The front section was then twisted into small two strands. I used the wave moisturizer for this part. 

Completed two strands!

I pulled the twists up and secured them with a hair comb. You can leave them down, secure up with a bobby pin, or other hair piece. You can be creative here!
SUGGESTION: See the white showing on my top bun? I'd suggest using a black sock, because of this. If you do have small gaps it won't be noticeable.

SUGGESTION: If a hair elastic is too thick/big for your hair try using a small rubber band to make the initial ponytail. That's what I ended up doing for the smallest bun in the very back.

To see another way I wore my sock buns check out an older post H E R E !!


Sock Buns are:
  • easy updos
  • good styles for transitioners
  • quick
  • easy to switch from casual to more formal
  • nice protective styles


~~ Do you have any variations of this style? Show me!! ~~


Don't forget to Like my Facebook Fan Page!! Follow me on Twitter @MzDezy

Sunday, October 16, 2011

Twist Out Update

As promised here are updates of my twist out. This style originally started as two strand flat twists. I had intended on wearing those over night, then wearing a twist out the following day. When I woke up it was raining, so a hair detour was taken. You can read more about that  H E R E!!


Before taking my twists down I put tea tree oil on the parts in between the twists. Besides a little tea tree oil on my scalp no other products were used.


I know I've said it a few times, but I'm going to say it again ^_^"  I am in love with my hair color!!!! Notice how shiny it is. It's also super soft, and manageable. I blame the henna ^_^" Love it!!


If you noticed, when I had the two strand flat twists in I tucked the ends under before pinning. This gives the ends of my hair more curl when I wear the twist out. It also makes a tighter, shorter curl. I'm on day 3 of my twist out, and over time the curls have loosened. 

The right side actually looks longer than the left side right now. My right side has a few curls that are hanging past my shoulder. This is caused by me making the flat twists on the left tighter than the right. The asymmetrical appearance of the curls doesn't bother me. If it's a concern for you, then I'd suggest trying to make the flat twists more uniform initially.

At night I haven't been covering my hair since wearing the twist out. I sleep on a satin pillow case, so my hair doesn't dry out. In the mornings I fluff my hair, and arrange it how I want. Usually some type of hair accessory is added to the from of my head. Above you can see the hair feather I added the first day.

Pros of this Style:

  • It transforms over the days you wear it. This minimizes the manipulation on your hair.
  • The two strand flat twists are a great protective style that can be worn casually, or dressed up with accessories.
  • You can achieve curls without harmful heating tools
  • This style can be worn on most hair lengths. If you can two strand flat twist your hair you can rock this.
  • It's very quick to style. The flat twists took me 10 minutes tops to complete.
  • Two strand flat twists can easily be worn in moisture filled environments. Rain, sweat, and humidity aren't an issue. 
  • It's a great style to wear while working out! It's protected, styled, and out of the way.

Have you tried this style before? What were your thoughts on it?? Share!

Saturday, October 15, 2011

Styling Tool Quickie: Perm Rods

I prefer perm rods over rollers when it comes to curling my hair, especially over night. Hard plastic rollers hurt to sleep in, or they'll have you sleeping in impossible positions to get a half nights rest. Sponge rollers tend to dry my hair out, because they're made out of sponges and draw out moisture. So perm rods are my preferred go to styling tool for curls.

I use mid-sized (pink) and large (purple) perm rods


There are many types of perm rods, different colors, sizes, and styles. I bought mine at Sally's Beauty Supply, but they're available at most hair stores. The perm rods came in, I believe, packs of 10 for about $3. Depending on the size you can create tight curls, waves, loose curls, and they can be used on most hair lengths.


Visit H E R E!! for more detailed info!


Uses for Perm Rods (besides perms):
  • Sets- style as if doing a roller set, sub rollers for perm rods. Great for transitioning hair and TWA!
  • Sets- style as if doing a spiral set. Great for curling locs, braids, two strands, etc
  • Restyle a protective style such as mini twists

After styling my hair with perm rods I cover them with a satin bonnet to protect them while sleeping. The longer you keep the perm rods in the tighter the curls will be. If you leave them in for a short amount of time you'll have more of a wave, then a curl. You can sit under a hair drier to speed up the process if desired.

Have you used perm rods for styles other than perms? Share!

Visit H E R E!! to see results of a style I did with perm rods ^_~"

Wednesday, October 12, 2011

Rainy Day Detour

Before I went to bed last night I planned on wearing a twist out today. I'm a pretty good judge on how my hair will behave when it comes to weather. I checked the forecast before bed, and it said 10% chance of rain. So I just knew that spending 10 minutes putting big flat two strands in would be worth it. Alarm goes off at 7:30am and all I hear is pouring rain   O_o 

You can probably see where I'm going with this-- no twist out was worn today. BUT my flat two strands are still in tact and look good! I believe it's suppose to rain the next few days, so I'll keep these in for a little while longer.


 S I D E   N O T E: I LOOOVE my hair color! I definitely plan on sticking with henna. My hair's been super soft and shiny too!

At night I covered my hair with a satin scarf. My skin in general has been on itch mode for the last couple of weeks. Grrr and winters not even here yet!! To help my itchy scalp I put tea tree oil on the parts in between my twists.

I apologize for it being sideways. The computer does not want to cooperate today  >_<


To dress up the style a little I added a hair flower (of course) some earrings, and off to work I went. Whenever I do take the twists down they'll be in loose spirals. You can see this style  H E R E!!  I wore it on my trip to Vegas.

The rain hasn't slowed this style. My protective style has done its job so far. I've been in and out of it today, and my hair still looks the same. I'll post updates later on.

ANNOUNCEMENT: I will be doing my 1st giveaway very soon, so stay tuned, and check back in for info on how to win!!!!!

Monday, October 3, 2011

Sock Bun Updo

I really like this style. I wore it for my birthday dinner, and one of the parties -- VIRGOS!! This is another style I learned from watching a how-to video by Mrs. PrettyDimples on YouTube. You can find a link to her YouTube channel under my "Links" tab at the top. I've seen people wear a similar style before, but never knew how they did it. It's SO simple, and I'll def try it again.


What I used:
  • Pair of old ankle socks
  • Scissors
  • Bobby pins
  • Hair ties/ Rubber band
  • Shea butter mix


This is a style that anyone can wear. Relaxed, chemical free, long, short--doesn't matter, you can wear this style. You can see two different ways that I wore the buns. One was more simple; I used a decorative hair comb to secure my two strand twists. The second one, bobby pins were used to secure the two strands, but a huge flower was added. You could add chop sticks, feathers, clips, just about anything to change up the style. Try doing three buns instead of two!


Changes I Made:
  • If you have dark hair it's better to use a black sock instead of white, or any other color
  • A rubber band was easier to cover than a thicker hair tie after making the bun
  • Hair ties used should be dark, or close to the hair color. I used brown
  • I kept my two strands together, but you could do a twist out for the bangs
  • The bun on the bottom was smaller than the top-- Rubber band used on bottom and hair tie used on the top
These are just things that I changed, or noticed while doing this after watching the YouTube video mentioned above.


At night I covered my hair with a satin bonnet after removing bobby pins. This style takes literally 10 mins max to do, so there was a point where I took down the whole thing, and re-styled in the morning. I wore this for about 4 days before moving on  ^_^"

Have you done this style before? Know any mods, or variations?? Share!

Variation: Two Strand Twists

I'm not sure why, but I always like to have one side of my hair in the front pulled back. This applies when wearing twist styles too. This style was completely random, and wasn't planned at all. In the winter I like to wear hats, and it's easier if my hairs styled in twists or a similar style. I started by making flat two strand twists on one side of my head. On the opposite side I made regular two strand twists. To get the curls I slept in perm rods over night. This style can last a couple of weeks if you care for it properly. At night I covered my hair with a satin scarf, and perm rods if I wanted more curls.


Flowers, pins, clip, hats, and other fancy accessories can be added to dress up this hair style. Even without pieces added this style is very nice. I like this a lot, I just might try it again very soon  ^_^"  There was no product used while styling, but it was done on freshly washed hair. It took maybe an hour to complete this.

Wednesday, September 28, 2011

Quickie: Two Strand Twists for Men

I love two strand twists!!! Love them, love them, LOVE them. They're not just for the ladies though, men can wear them too! The process for the twists is the same for males and females. One difference that I do make when doing two strands on guys is the size and position of them. Most guys don't want a bang of twists for example. When I do other people's hair I take a little more care than when I do my own to make sure it's the best, it'll last, and that they come back.


I always start the two strands in the back at the nape of the neck and work my way forward. When doing guys hair I don't work in quarters, instead I work in rows if that makes sense. So, starting in the very back I part a row of hair to twist, and clip the rest of the hair up, and out of the way. If the hair's dry, I spray it; add product, and then twist. When the row is done I part a new one and repeat. The twists closest to the neck are small so that they hold and won't come undone from shirts, coats, or anything rubbing. Hair around the edges of the head and near the front generally are small too. The section in the middle, on guys, I typically twist a little bigger than I would on myself.


~~~~~~~~~~~~~~~~~~~~~~~~~~~~~~

What I Used:
  • Wide toothed comb
  • Hair clips
  • Spray bottle (water, lavender EO mix)
  • Eco Styler Argon Oil Gel
~~~~~~~~~~~~~~~~~~~~~~~~~~~~~~


You're able to wash your hair still while wearing two strands. If your scalp isn't too dirty you can co-wash -- meaning cleanse your scalp using conditioner to get rid of dirt and product without the 'poo (shampoo that is). Two strands can last as long as you're willing to let them, or maintain them. A second style for the fellas, undo the two strands and wear a twist out. At night you should protect your hair by wearing some type of satin cap, and/or sleeping on a satin pillow case. I don't know many men who own, or at least admit to owning, satin cases, so the head cap will work  ^_~"

Wednesday, August 10, 2011

Myspace, afros, twists...and More!!

Not too long ago for some super random, strange reason, I remembered Myspace! Forgot ALL about that website, and me having a long lost profile on it. With some playing around of email-password combos I was able to login. Boy oh boy was I entertained for about 15 minutes! On my profile are a ton of pictures that go back a few years.

One of the things that stood out to me was how my hair has changed over time and how often. I rediscovered pictures of me with a relaxer, during my FIRST try at transitioning, after my BC (big chop), with braid extensions, with hair tracks, etc. It took me about three tries before I actually stuck with being chemical-free. Saying no to a relaxer was definitely not the easiest thing I've done. Now, there's no turning back for me =^_^= Enjoy!


My first couple attempts at transitioning:


I remember this hurting SO much to comb!! I had no clue how to manage my transitioning hair. That ultimately sent me back to a relaxer.
 
At the beginning I found it easier to maintain my do' by blow drying and straightening it. I do NOT suggest that if your ultimate goal is to have healthier hair!


~~~~~~~~~~~~~~~~~~~~~~~~~~~~~~


Love roller-sets!! If I had a hooded drier I'd wear them more often.

Reasons I like Roller-Sets:
  • It's a SET style, so it'll last longer than a style usually would
  • You can set your hair by air drying
  • Even though your hair's "set" there's still versatility in styles you can wear
  • If you do visit a salon they're usually very inexpensive to get


Comb twists (coils), or finger twists is another great style! A different look with similar pros of roller-set styles.
 ~~~~~~~~~~~~~~~~~~~~~~~~~~~~~~

Protective Styles:


Two Strand Twists curled with rollers

Single Braid extensions that a friend did for me back in the dorm days

Corn Row Braids with hair extensions. The hanging braids can be twisted into a bun at the neck for a different look.

Christmas with Scrappy!!!
Senegalese Twists with hair extensions that were curled with hot water


Pros of Protective Styles:
  • They help minimize breakage that your hair might incur from daily wear
  • Usually can be worn for a long period of time
  • With braid extensions I was still able to wash/condition my hair regularly
  • Easier to just "get up and go"
~~~~~~~~~~~~~~~~~~~~~~~~~~~~~~
The last point mentioned might be one of my favs! I like to just get up and go...get as many winks in as I can . This is why wash and go's are at the top of my list for hairstyles!


My 24th bday party I believe


NERD Concert!!!!!!

Wash n Go Fro


Side View

Front Row of a N*E*R*D  concert


A very spontaneous shot! Was helping a photog out at an event.


Night out with my girl! Good times!!

Big bro and I!! Wash and go with short locs.
For the most part, wash and go's are preferred by me, because of what they simply are. In and out, but still looking good! There are a number of different ways that I go about doing my wash and go's.

Keep an eye out for that posting and others in the near future!  ^_~"   Don't forget to follow me for updates. I also LOVE feedback, thoughts, advice, etc., so keep it coming and thank you!!! *MUAH*