Showing posts with label Shea Butter. Show all posts

Friday, April 20, 2012

Step by Step: Hawk Variation

After wearing my hair in a twist out for a while I needed to wash and style it for Easter, but was short on time. Instead I thought of an easy style to get me through the day until I could wash my hair that night. The end result of this style looks like a mohawk made of puffs.

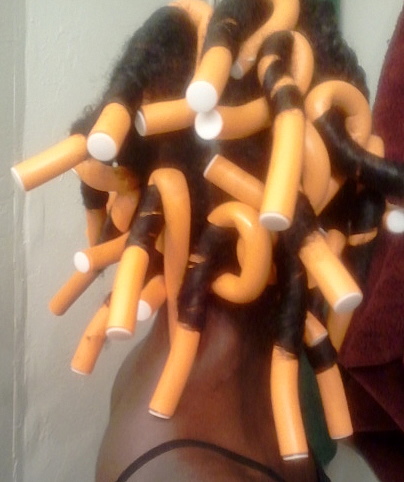
Tools I used: Shea butter mixture, 3 rubber bands, 7 standard sized protected bobby pins, 1 large protected bobby pin, and hair pins (number may vary)


I didn't want to manipulate my hair too much so I didn't use a comb. To begin I smoothed on my shea butter mixture to moisturize my hair and to give it a shine. Next I sectioned my hair into 4 sections making the biggest in the front of my head.


(Right) The red shows where a rubber band is used. The brown shows where rough parts were made.

Tip: If you part your hair using a comb you'll be able to see the parts easier in the finished product. If you use your hands/fingers to section your hair there won't be parts showing in the finished style.

 ~~~~~~~~~~

The very first hump in a basic pompadour secured with one large bobby pin. Once that's completed I moved on to the next pony tail in line. The hair is roughly divided into two parts, rolled, and then secured with a standard bobby pin.

 (Right) The red shows how the pony tail is roughly divided into two parts. The brown shows where the rubber band is securing the ponytail.

Tip: The rubber bands don't have to be very tight, or to pull your hair uncomfortably in any way. The sections that are pinned don't have to be exactly the same size either.

~~~~~~~~~~

After your first section is finished it should look similar to this:

 (Right) The brown shows the direction the hair was rolled. Yellow shows where a bobby pin was placed and red shows the rubber band that was used.

Tip: You can see that the pompadour was bobby pinned in two places since the section was so large. I made the next section's rolls large enough to touch and blend with the roll next to it. You won't notice the rubber bands once the rolls are done.

~~~~~~~~~~

Continue to roll and pin for the remaining pony tails.


Tip: When you section your hair, if you make the sections smaller as you go towards the back of your head the puffs will appear to cascade down your head ^_~" Also, when securing with the standard bobby pins, place one pin on each side of the roll. This will help minimize the amount of bobby pins needed.

~~~~~~~~~~

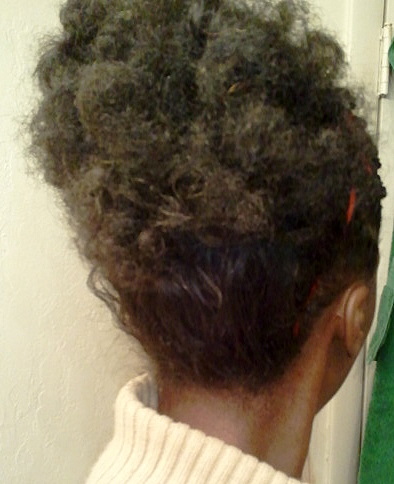
The last step when all of the rolls are pinned is to just clean up any stray hairs, curls, or make the puffs tighter with the hair pins. Since I started this with hair that had been previously twisted I had random strays all over the place.

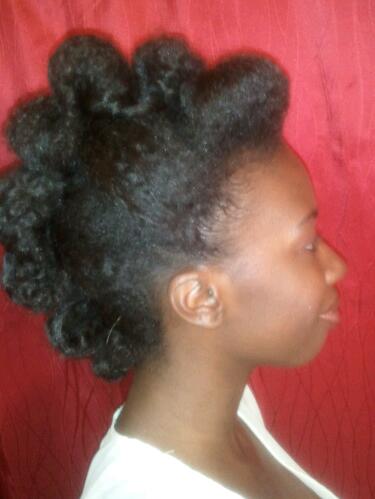
After pinning everything how I liked here is the result:


Follow & Tweet me @MzDezy

 ~~~~~~~~~~

Night Care: Since this style is so simple to do I take it down completely and cover with a satin bonnet before bed. In the morning I sprits with my EO water mixture, smooth and restyle.


This hawk variation, puff hawk --- what would you call it?? --- has many pros:
  • Can be worn by people with different hair lengths
  • The number of puffs can be changed very easily to switch up the style
  • People who are transitioning can wear this style
  • Doesn't take a lot of time to style
  • Easy style for people of all skill levels to achieve
  • Can serve as a protective style since the ends of your hair are covered
~~~~~~~~~~

I encourage you to try this style!! If you do make sure you post it on the Facebook Fan Page, so that it may be added to the "Hair I Did" album for others to see! You're welcome to post any and all natural hair pictures of styles you've created or styles that inspire you in some way!

Saturday, November 26, 2011

Style Quickie: Twists & Poof

For the longest time I've been so against doing mini twists on myself. The time it takes to complete them is really the sole reason for not wanting to do them. I began this style with full intentions of doing mini twists. As you can see that didn't happen. This style turned out nice anyways!


As always I started with a freshly washed head of hair. I used was my whipped shea butter mix, and essential oil water mix when my hair dried faster than I could style. On one side I put a few flat two strand twists, then bobby pinned out of the way while I two strand twisted the front of my head. Once that was completed, I had no motivation to twist anymore hair! I wasn't sure what else I wanted to do with it, but I didn't want it to take all day. Flexi rods to the rescue!! I still haven't mastered flexi rods on wet curly hair yet, so the results weren't perfect. Some curls were perfect, and some had frizzy ends. Over all the look wasn't terrible.


A high poof is what became of the flexi rod curls!

A nice headband added, and I'm off to work!


My poof was held in place with a few bobby pins. I wore this style for about 5 days before taking out the flat two strand twists. To wash, and to keep my two strands in tact, I clipped them together. The back and sides of my head I washed as normal, then gently cleaned my scalp where the two strand twists were.

I've washed my hair about three times since the style was first started. In the back of my mind I was still swearing off mini twists. Didn't work though, by the end of the weekend I'll have a full head of mini twists. Stay tuned for pictures!


Other Ways I Styled:

~~ After washing I did medium twists all over, let air dry, then wore a twist out with the two strands in front
~~ Slept with flexi rods on the two strands to give them some curl, and paired with the twist out
~~ Wore a poof and added a large hair flower to the side of it, and wore the two strands as curly bangs
~~ Rolled the loose hair into a french roll, then added a flower. The two strands were swooped to one side


** News **

I finally got my Etsy Shop open for business!!!! Does anyone else have a shop? Share your links!

Monday, October 24, 2011

Coconut Oil

My latest venture was making whipped shea butter with coconut oil! I love shea butter, coconut oil, and essential oils, so why not make something great out of all of them? This time around I made sure to take pictures of the process.


What I Used:
~~~~~~~~~~~~~~~~~~~~~~~~~~~~~~

Using a double boiler, on a medium heat I melt the shea butter and coconut oil. About two parts raw unrefined shea butter was used to about one part organic extra virgin coconut oil. It takes a few seconds for it to melt completely. That's fine, because I don't want to cook the oils; I just want them melted.

Once the majority of the shea butter and coconut oil is melted I turn the heat down to low. Using a plastic knife I gently stirred the remaining chunks until melted. After completely melting, I add in Vitamin E Oil, Olive Oil, and Carrot Oil. It looks like popcorn oil.

~~~~~~~~~~~~~~~~~~~~~~~~~~~~~~

Next, it's time to cool the oil down to stop the cooking process, and so that it may be whipped! I put the entire pot into the freezer for about 3 minutes. After removing, I use a hand mixer (on a medium setting) to whip the oils together.


I mixed the oils for about 3 minutes before returning the pot to the freezer. In the beginning you'll notice that the mixture returns to its liquid state. The friction caused by the mixer reheats the oil, so the process of mixing/chilling has to be repeated a few times.

Soon you'll see froth on top of the oils. This is caused by the air forced into the oils by the mixer. You want to see this; it's what will make the whipped product light and fluffy.

~~~~~~~~~~~~~~~~~~~~~~~~~~~~~~

After repeating this process a few times the mixture will start to thicken up.


At this point you want to start paying extra attention to your mixture. Keep blending, but cut the time in the freezer down so you don't over chill the mix. It'll remind you for a watery pancake batter. If you want a more airy product set the blender speed to high. This will force more air into the oils.

~~~~~~~~~~~~~~~~~~~~~~~~~~~~~~

Now is when I add in any EO that I plan on using. For this mixture I used about 6 drops of Lemon EO and about 30 drops of Lavender EO before blending. Smell the whipped mix, and if the scent isn't to your liking adjust the number of drops you use.


When you see a "skin" forming on the top after putting in the freezer you no longer need to chill the mixture. Continue to blend until you reach a consistency that you like. Keep in mind that the mixture will solidify a little more after it completely chills.

~~~~~~~~~~~~~~~~~~~~~~~~~~~~~~

When the shea butter-coconut oil mixture starts to look like a body butter, or thick lotion I stop blending. This is the consistency I desire. If you keep blending the result will be more airy and solid. Stopping here gives you a creamier product. In the end both ways will melt at body temperature.


~~~~~~~~~~~~~~~~~~~~~~~~~~~~~~

Using my plastic knife I scrape in my whipped shea butter into small glass jars with air tight lids. A piping bag (like bakers use) could be used to help transfer the whipped shea butter into containers.


As you can probably tell, the results resemble a lotion. The consistency will vary depending on the air temperature. The amount of coconut oil you use will help determine this. If stored in a cool place it'll remain soft, but solid.

~~~~~~~~~~~~~~~~~~~~~~~~~~~~~~

Pros of this Mix:
  • The acid in Lemon EO will help seal the hairs cuticle trapping in moisture
  • Lemon EO acts as a clarifier to your hair helping to remove excess product and add shine
  • Lavender EO is great for dry, oily, or damaged hair, because it helps normalize natural oil production
  • Both Lemon EO and Lavender EO help fight the causes of dandruff.
  • Coconut oil melts at about 75 degrees, so your natural body temp helps it spread. Less product needed
  • Coconut oil is a natural antimicrobial
  • Shea butter and coconut oil are both great hair and skin conditioners
  • Shea butter has many healing properties
  • Shea butter is quickly absorbed by the skin
  • Carrot oil is high in antioxidants that help fight hair loss
  • Olive oil helps improve elasticity (how far hair can stretch before breaking) of dry hair
  • The whipped mix isn't as thick as raw shea butter, so people who were turned off by that have a new alternative

Uses for this Mix:

There are a few samples of my whipped shea butter mixtures floating around out there. Hopefully soon I'll have a couple reviews back on it. Try to create your own mixes. What would you use??

Thursday, October 20, 2011

Whipped Shea Butter

Going to a salon on occasion is great, but once I figure out the routine that's used for my hair, products, etc. I'm off to doing it myself. Doing this saves me money, time, and helps me take care of my hair the best. This applies to finding a great store bought product. I like to research ingredients, the how's and why's, then I'm off to making it, and usually replicating it cheaper. An example of this is my whipped shea butter mix! I absolutely love shea butter. I've used it for years on my skin, my hair, cuts, itchy spots, light burns, etc. Other things I commonly use is Vitamin E oil, olive oil, and lavender essential oil (EO). I know all of the benefits of these, so why not combine them into one great product?!


The final result!!!

What I Used:
  • Unrefined Shea Butter - Great healing and moisturizing properties
  • Carrot Oil - Beta carotene helps dry/chapped skin. Great for hot oil treatments, because it helps smooth and strengthen hair
  • Vitamin E Oil - Can help prevent scarring, sooth burns, protects against UV rays
  • Olive Oil - A deep penetrating moisturizer, natural cell generator, and anti-inflammatory
  • Sunflower Oil- Great for mature, damaged, or sensitive skin. It's easily absorbed, and full of omega oil, vitamin A, E and D
  • Caster Oil - Rich in fatty acids, a humectant (draws moisture) and natural anti-inflammatory
  • Grapeseed Oil - Great for sensitive skin. It's light and good to use as a carrier oil for EO
  • Sweet Almond Oil - Skin conditioner that's good for eczema, dry, or itchy skin, and is easily absorbed. It's a good substitute for Olive Oil
  • Jojoba Oil - Closely resembles the oil your scalp natural produces. It's actually a non greasy liquid wax.
  • Lavender EO- Natural disinfectant of the skin and hair. Helps stimulate blood circulation, and calms the skin
  • Ylang Ylang EO- Means "flower of flowers" and is the essence from a flowering cananga tree. Helps normalize sebum (oil) production in the skin, condition hair, and stimulate hair growth.
  • Peppermint EO - Contains fatty acids, calcium, vitamin A and C. It stimulates blood circulation, is good for oily skin, and dull hair 
~~~~~~~~~~~~~~~~~~~~~~~~~~~~~~
After carefully melting, mixing, cooling, and blending my Whipped Shea Butter was created!! I'm in love with it. I used this after washing my hair, and before putting my hair on flexi rods. This is day 5 and my curls still look fresh, my hair is super soft, shiny, and smells good! I'll continue to make and use this mix.  There are so many beneficial ingredients and I'm not limited to just hair use. This whipped shea butter can be used as a skin conditioner also, in place of lotions or creams.
~~~~~~~~~~~~~~~~~~~~~~~~~~~~~~


Pros:
  • It's a light weight product. The whipped shea butter melts with body temperature
  • The scent is light and it smells great
  • A little goes a long way
  • It cost less than $10 to make about 1 pound of whipped shea butter
  • Multi-functional; can be used on hair and the body
  • It's non greasy and is easily absorbed into the skin

Alternative Ingredients:
Coconut Oil
Tea Tree Oil
Mango Butter as the base
Coco Butter as the base
Aloe Vera Oil
Cotton Seed Oil
Honey*
Rosemary EO
Soybean Oil

Do you have a recipe for whipped shea butter? What ingredients do you use?

Wednesday, October 19, 2011

Shea Butter

Shea butter is one of my favorite products to use for my hair and skin. It's definitely something that can always be found in my house. There are so many beneficial qualities and uses for it. Shea butter has natural fatty oils that help seal in moisture, nourish, and protect both your hair and skin.


Shea nuts

What is Shea Butter??
Shea butter is actually the fat that's extracted from an edible nut of the shea, or Karite tree. Karite (ka-ree-tay) means, tree of life. It can take 1 tree up to 20 years to mature, and they can live over 200. Fruit from the tree take up to 6 months to ripen. Shea trees are indigenous to countries in central Africa.


This is typically the way I find shea butter sold locally.

Difference between refined and unrefined??
Unrefined shea butter is in its most natural state. It hasn't been stripped, or put through any chemical processes. Unrefined shea butter is most beneficial, because it retains all of its vitamins and healing properties. Refined shea butter has been chemically processed to help extract it from the nut, alter the color, texture, or even smell. This process strips shea butter of its vitamins and can leave contaminants behind.

~~~~~~~~~~~~~~~~~~~~


Facts:
  • Melts at body temperature and is easily absorbed, so a greasy feeling isn't left behind
  • Used in some chocolates as a cocoa butter substitute
  • Raw/Unrefined shea butter is best, because there are no contaminants in it such as solvents or preservatives
  • A humectant (holds moisture)
  • A natural anti-inflammatory
  • Absorbs UV rays
  • Helps improve wrinkles, eczema, sunburn, stretch marks, mild muscle aches, scars, and other skin ailments
  • Full of Vitamin A and E
  • Naturally contains a form of latex
  • Can range in from a light beige to a yellow color

~~~~~~~~~~~~~~~~~~~~

Difference between shea and other seed oils??
The main difference is the nonsaponifiable (healing) fraction. This is the proportion of vitamins and nutrients needed for healing properties. An oil or butter can have great moisturizing (saponifiable) properties, but if it provides a low percentage of nutrients or vitamins to the skin the benefits of its use are low. Most seed oils healing fraction is than 1% while shea has 5% to 17% depending on how it's processed. This high healing percentage, along with sheas great moisturizing abilities is what makes it stand apart from other seed oils.


Grades of Shea Butter:

A (cream to grayish yellow in color) - Raw or unrefined; usually extracted using water
B- Refined
C (white in color) - Highly refined; usually extracted with a solvent. Vitamin content starts to lower
D- Lowest uncontaminated grade. Nutrients and the natural scent are almost completely removed
E- Has contaminants. May be used as a moisturizer, but is poor quality for any other benefits


****Color depends on factors such as: the region, age of tree, season, and the type of processing.


Common Products with Shea Butter:
  • Skin Moisturizers
  • Shaving Creams
  • Anti-Itch Creams
  • Soap
  • Cosmetics
****Remember to check the ingredients. If you're going to spend extra money, because a product contains shea butter make sure you're getting all you can!  H E R E!!  I show you how to look at the ingredients list.