Showing posts with label Deep Conditioning. Show all posts

Saturday, November 12, 2011

Product Quickie: Moisture Milks

I was on the hunt for some new cheap conditioner to do wash n go's with, and stumbled across these!! V05 Moisture Milks. I ended up leaving with the shampoo and conditioner. I like both of these a lot! A little product goes long way. With some shampoos I have to use a ton to get some type of lather, but with this a quarter size amount was plenty. The conditioner worked very well for my wash n go's and I'll definitely be using them again.

Bought from the Dollar Tree for $1 each!!

The fragrance is passion fruit smoothie, and smells amazing! Both the shampoo and conditioner contain soy protein. Protein helps strengthen damaged, or dry hair. After washing my hair it felt super super clean, soft without feeling stripped, and my hair was very shiny. This was my first time using any V05 products and I'm impressed. I'll be on the look out for more V05 products, and deals!


Protein Quickie:
  • Soy protein comes from a vegetable source instead of animal
  • Hair is actually made of a protein called keratin
  • Soy protein is a low fat way to get nutrients without worry's of cholesterol from animal protein
  • It helps in hair growth and fights hair loss


~~~~ Another plus of these two products is that they weren't tested on animals! ~~~~

Have you tried either of these products? What did you think of them?

Friday, November 11, 2011

Link Between Food & Hair?!?

What does diet and hair have to do with each other?? Do you know the answer? Believe it or not they are directly related! If your diet doesn't have enough fatty acids, vitamins, and protein, for example, you could experience hair loss. Not having enough, or an imbalance can cause dry, brittle hair.

FACTS:
  • To make sebum (oil in scalp/hair) your body needs Vitamin A and C
  • Not getting enough zinc can cause your hair to shed
  • A low protein diet can result in brittle hair, or even loss of hair color
  • Vitamin A helps condition the skin, which leads to shinier hair
  • Not getting the proper amount of calories can stunt your hair growth
I always try to be conscious of what goes into my body, the long term effects, and being healthy over all. I've seen what poor food choices can do to you over the years; I've even had my own scare, and to me it's not worth it. I haven't always been this way though! If I wanted it, it looked and smelled good, and then I was going to eat it. Negative effects on the body, skin, hair, etc wasn't even on my mind. Over time, I've learned that your health is something that you can't always get back. You don't always have a say in what happens to your body, but the areas that you do--take advantage while you can.

You don't have to swear off meat, only eat yogurt, or strictly stick to green foods, but you should be aware of the pros and cons.  ^_^" You may already have an eating style that you're not aware of! I didn't know I fit into a category. Personally, I don't eat red meat, but I had no clue there was a name for that. I just knew I avoid eating Bessie at all costs...and Babe too! Nemo and Chicken Little weren't out of the woods though!

Partial Vegetarian is what my eating style is called. Basically I avoid red meat, but may eat fish, poultry, dairy, and eggs. Carnivore, vegan, ovo vegetarian, and flexitarian are more examples of eating styles.

What's your eating style? Need more info to decide? Check out a blog post I did on eating styles H E R E!! Comment below and tell me what yours is!!

Wednesday, November 2, 2011

Quick Style: Wash n Go

Here's one method of how I do a quick, simple wash n go! This took a max of 10 minutes to complete, if that.

Things needed:

Wide tooth comb
Conditioner
Spray bottle
Essential oil (EO) of your choice
Towel (optional)


~~~~~~~~~~
To Make an EO Mix: I use a spray bottle that's easy to control and hold in one hand. Fill it with warm water, then (depending on the size) add about 3 drops of lavender EO, and give it a quick shake.
~~~~~~~~~~

 
I try to never comb my hair while dry, because it rips, tears, and risks damaging it. Detangling almost always takes place while I'm washing my hair, and it's covered in conditioner. Detangling while conditioner is on your hair helps lubricate and protect the strands. Conditioner also smoothes the cuticle making it harder for strands to catch, tangle, or pull while combing.

To begin I soak my entire head (using warm, not hot, water) and rinse until the water runs clear. I do this to make sure any product that may be in is rinsed out. Next, I co wash (cleanse hair/scalp using conditioner instead of shampoo) rinse again, then squeeze (not twist) excess water out. After rinsing I soak my hair in conditioner, making sure all sections are covered evenly.


Soaked in conditioner!!

~~~~~~~~~~

Once the conditioner's in I spray down my entire head very well with the EO mixture. To prevent product build up you want about half of the conditioner to be diluted. When the EO mix is in I massage it around for a few seconds, and then detangle using a wide tooth comb. I start around the edges and ends of my hair, and then work my way closer to the crown and roots. If necessary I hold sections of hair so that strands aren't pulled or ripped out in the process. The wide tooth comb helps in the detangling, and it help define curls without manipulating them too much. If you twist, pull, or rub curly hair while it's wet (or in the drying process) you can cause unwanted frizz. This is why I don't use a towel for wash n go's, but if you choose to be gentle!

Just a little conditioner left after the EO mix spray down and detangling!

~~~~~~~~~~

****This is all done on the side of my tub and/or holding my head upside down (let gravity help you) ****

~~~~~~~~~~

Ignore the brows 0_o I was trying to get them together while doing my hair and I need an outline to help  ^_^"
Notice the definition on my curls!! I love it!

Tadaaa...hair and brows done in about 10 minutes! You can move your hair around to where you'd like it to be when dry. Try not to manipulate it too much so that you may prevent frizz.
~~~~~~~~~~

Pros to Wash n Go's:
  • Low maintenance- to refresh in the mornings just spritz with the EO mix and fluff
  • Moisture (water) gets sealed in your hair by the oils in the EO mix
  • You're helping your hair maintain its flexibility by keeping it moistened and conditioned
  • Time needed for styling is minimal
  • Can be done with cheap/expensive product
  • Conditioner coats the cuticle adding protection to the hair
  • Protein conditioners strengthen hair from the inside out
  • Conditioner help define and give a slight hold to curl patterns in hair without gel
~~~~~~~~~~

Want More Info on Essential Oils? View some of my older posts!!


Want to see another wash n go method?

~~~~~~~~~~

Quick Tips:

***Using the above method you can turn an old twist/braid/knot out into a quick wash n go. This is helpful when you just have to do something to your hair but are short on time!

***Jazz up a wash n go by adding an accessory such as: hair flower, clips, colorful head band, or a fancy scarf.

***If you have different hair/scalp needs experiment with different EO mixes to help. Example: if you have oily hair, or dandruff you may want to try a Rosemary EO mix.

***I don't recommend this style for someone who's transitioning. Unless you have very little relaxed ends remaining it may not look the best if long pieces remain straight.

~~~~~~~~~~

I'd like to thank everyone who submitted an entry for my 1st Giveaway!! All of the entries were VERY good and creative...I loved them! I'll be announcing the winner soon! Be on the look out for more Giveaways.

I also want to welcome, and thank everyone who's joined/liked A Natural Hair Affair on Facebook, have followed my blog, and watched my YouTube videos! I appreciate all of the questions, feedback, emails...everything! I love talking to new people, learning and exchanging info! Keep it coming ^_~"

~~~~~~~~~~

Monday, October 24, 2011

Coconut Oil

My latest venture was making whipped shea butter with coconut oil! I love shea butter, coconut oil, and essential oils, so why not make something great out of all of them? This time around I made sure to take pictures of the process.


What I Used:
~~~~~~~~~~~~~~~~~~~~~~~~~~~~~~

Using a double boiler, on a medium heat I melt the shea butter and coconut oil. About two parts raw unrefined shea butter was used to about one part organic extra virgin coconut oil. It takes a few seconds for it to melt completely. That's fine, because I don't want to cook the oils; I just want them melted.

Once the majority of the shea butter and coconut oil is melted I turn the heat down to low. Using a plastic knife I gently stirred the remaining chunks until melted. After completely melting, I add in Vitamin E Oil, Olive Oil, and Carrot Oil. It looks like popcorn oil.

~~~~~~~~~~~~~~~~~~~~~~~~~~~~~~

Next, it's time to cool the oil down to stop the cooking process, and so that it may be whipped! I put the entire pot into the freezer for about 3 minutes. After removing, I use a hand mixer (on a medium setting) to whip the oils together.


I mixed the oils for about 3 minutes before returning the pot to the freezer. In the beginning you'll notice that the mixture returns to its liquid state. The friction caused by the mixer reheats the oil, so the process of mixing/chilling has to be repeated a few times.

Soon you'll see froth on top of the oils. This is caused by the air forced into the oils by the mixer. You want to see this; it's what will make the whipped product light and fluffy.

~~~~~~~~~~~~~~~~~~~~~~~~~~~~~~

After repeating this process a few times the mixture will start to thicken up.


At this point you want to start paying extra attention to your mixture. Keep blending, but cut the time in the freezer down so you don't over chill the mix. It'll remind you for a watery pancake batter. If you want a more airy product set the blender speed to high. This will force more air into the oils.

~~~~~~~~~~~~~~~~~~~~~~~~~~~~~~

Now is when I add in any EO that I plan on using. For this mixture I used about 6 drops of Lemon EO and about 30 drops of Lavender EO before blending. Smell the whipped mix, and if the scent isn't to your liking adjust the number of drops you use.


When you see a "skin" forming on the top after putting in the freezer you no longer need to chill the mixture. Continue to blend until you reach a consistency that you like. Keep in mind that the mixture will solidify a little more after it completely chills.

~~~~~~~~~~~~~~~~~~~~~~~~~~~~~~

When the shea butter-coconut oil mixture starts to look like a body butter, or thick lotion I stop blending. This is the consistency I desire. If you keep blending the result will be more airy and solid. Stopping here gives you a creamier product. In the end both ways will melt at body temperature.


~~~~~~~~~~~~~~~~~~~~~~~~~~~~~~

Using my plastic knife I scrape in my whipped shea butter into small glass jars with air tight lids. A piping bag (like bakers use) could be used to help transfer the whipped shea butter into containers.


As you can probably tell, the results resemble a lotion. The consistency will vary depending on the air temperature. The amount of coconut oil you use will help determine this. If stored in a cool place it'll remain soft, but solid.

~~~~~~~~~~~~~~~~~~~~~~~~~~~~~~

Pros of this Mix:
  • The acid in Lemon EO will help seal the hairs cuticle trapping in moisture
  • Lemon EO acts as a clarifier to your hair helping to remove excess product and add shine
  • Lavender EO is great for dry, oily, or damaged hair, because it helps normalize natural oil production
  • Both Lemon EO and Lavender EO help fight the causes of dandruff.
  • Coconut oil melts at about 75 degrees, so your natural body temp helps it spread. Less product needed
  • Coconut oil is a natural antimicrobial
  • Shea butter and coconut oil are both great hair and skin conditioners
  • Shea butter has many healing properties
  • Shea butter is quickly absorbed by the skin
  • Carrot oil is high in antioxidants that help fight hair loss
  • Olive oil helps improve elasticity (how far hair can stretch before breaking) of dry hair
  • The whipped mix isn't as thick as raw shea butter, so people who were turned off by that have a new alternative

Uses for this Mix:

There are a few samples of my whipped shea butter mixtures floating around out there. Hopefully soon I'll have a couple reviews back on it. Try to create your own mixes. What would you use??

Thursday, October 20, 2011

Whipped Shea Butter

Going to a salon on occasion is great, but once I figure out the routine that's used for my hair, products, etc. I'm off to doing it myself. Doing this saves me money, time, and helps me take care of my hair the best. This applies to finding a great store bought product. I like to research ingredients, the how's and why's, then I'm off to making it, and usually replicating it cheaper. An example of this is my whipped shea butter mix! I absolutely love shea butter. I've used it for years on my skin, my hair, cuts, itchy spots, light burns, etc. Other things I commonly use is Vitamin E oil, olive oil, and lavender essential oil (EO). I know all of the benefits of these, so why not combine them into one great product?!


The final result!!!

What I Used:
  • Unrefined Shea Butter - Great healing and moisturizing properties
  • Carrot Oil - Beta carotene helps dry/chapped skin. Great for hot oil treatments, because it helps smooth and strengthen hair
  • Vitamin E Oil - Can help prevent scarring, sooth burns, protects against UV rays
  • Olive Oil - A deep penetrating moisturizer, natural cell generator, and anti-inflammatory
  • Sunflower Oil- Great for mature, damaged, or sensitive skin. It's easily absorbed, and full of omega oil, vitamin A, E and D
  • Caster Oil - Rich in fatty acids, a humectant (draws moisture) and natural anti-inflammatory
  • Grapeseed Oil - Great for sensitive skin. It's light and good to use as a carrier oil for EO
  • Sweet Almond Oil - Skin conditioner that's good for eczema, dry, or itchy skin, and is easily absorbed. It's a good substitute for Olive Oil
  • Jojoba Oil - Closely resembles the oil your scalp natural produces. It's actually a non greasy liquid wax.
  • Lavender EO- Natural disinfectant of the skin and hair. Helps stimulate blood circulation, and calms the skin
  • Ylang Ylang EO- Means "flower of flowers" and is the essence from a flowering cananga tree. Helps normalize sebum (oil) production in the skin, condition hair, and stimulate hair growth.
  • Peppermint EO - Contains fatty acids, calcium, vitamin A and C. It stimulates blood circulation, is good for oily skin, and dull hair 
~~~~~~~~~~~~~~~~~~~~~~~~~~~~~~
After carefully melting, mixing, cooling, and blending my Whipped Shea Butter was created!! I'm in love with it. I used this after washing my hair, and before putting my hair on flexi rods. This is day 5 and my curls still look fresh, my hair is super soft, shiny, and smells good! I'll continue to make and use this mix.  There are so many beneficial ingredients and I'm not limited to just hair use. This whipped shea butter can be used as a skin conditioner also, in place of lotions or creams.
~~~~~~~~~~~~~~~~~~~~~~~~~~~~~~


Pros:
  • It's a light weight product. The whipped shea butter melts with body temperature
  • The scent is light and it smells great
  • A little goes a long way
  • It cost less than $10 to make about 1 pound of whipped shea butter
  • Multi-functional; can be used on hair and the body
  • It's non greasy and is easily absorbed into the skin

Alternative Ingredients:
Coconut Oil
Tea Tree Oil
Mango Butter as the base
Coco Butter as the base
Aloe Vera Oil
Cotton Seed Oil
Honey*
Rosemary EO
Soybean Oil

Do you have a recipe for whipped shea butter? What ingredients do you use?

Thursday, October 13, 2011

Olive Oil Treatment

Hot oil treatments are one of my favorite things to do to my hair and scalp! They can come in handy in the hot summer time, or during the cold, dry winter. Personally I don't do them more than twice a month, if that often. There are a ton of premixed oil treatments at stores, but you can easily make it with things you probably have at home already. Carrier oils that I like to use for treatments are jojoba, carrot, coconut, tea tree, and olive. To enhance these oils even more I like to add vitamin E oil, vitamin A oil, or even a drop or two of an essential oil (EO) such as lavender. Here's a simple recipe:

~~~~~~~~~~~~~~~~~~~~~~~~~~~~~~

Olive Oil Treatment

1/4 Cup Olive Oil (less if hair is short)
1 Tablespoon Honey
3 Drops of your favorite EO (optional)

*** Mix the ingredients together in a bowl, and then add to damp hair. Make sure to concentrate on your ends. Cover your hair and leave on to condition. If you have a heat cap leave the mixture on for 20 minutes. If you're using a regular shower cap leave the mixture on for 40 minutes. Next rinse your hair well, then continue, and style as usual.

~~~~~~~~~~~~~~~~~~~~~~~~~~~~~~


Benefits of Olive Oil:
  • Helps keep the scalp conditioned and moisturized preventing dry scalp and dandruff
  • Contains natural fatty acids and can help minimize frizz, dry, or damaged hair
  • Adds shine that sulfates (found typical shampoos) strip from your hair
  • It's linked to preventing hair loss by stopping production of the hormone DTH
  • It's a natural anti-fungal and antibacterial

Benefits of Honey:
  • Helps seal in moisture, because it's an humectant (holds water)
  • Contains vitamins such as: B1, B2, B6, B5, B3, C
  • Trace amounts of iodine, zinc, and copper are found in it
  • It's a natural anti-fungal and antibacterial
  • Full of antioxidants which help prevent cell damage
** Honey naturally contains trace amounts of hydrogen peroxide, so over time it can lighten your hair. This would depend on how frequent you use honey in your hair, or mixtures.

~~~~~~~~~~~~~~~~~~~~~~~~~~~~~

T I P !!

*** To turn this recipe into a hot oil treatment put the mixture into an empty bottle and let it sit in warm water as you wash your hair. The water will warm the oil before you use it.


~~~~~~~~~~~~~~~~~~~~~~~~~~~~~

 
This hair olive oil hair treatment is great for anyone who has heat damaged hair, chemically damaged hair, dry scalp, dry hair, dull hair, lifeless hair, and anyone who wants healthier hair! Try it out and let me know your thoughts!! Do you have any hair treatments of your own? Share!!

Monday, October 3, 2011

Protective Style: Senegalese Twists

When I was going through my transition phase I tried to keep my hair braided, or in some type of protective style. My plan was to wear styles like this until my hair was to a length I could work with. Wearing protective styles also help lower the anxiety I was having over transitioning. At the beginning it was extremely hard for me to do my hair since it had two completely different textures. Your hair is prone to breakage during transitioning. The part of your hair where the relaxed meets the chemical free is the weakest. You have to take great care in protecting this area specifically.

Senegalese twists are so beautiful; I love them! Just as their name suggests, they originate in Senegal, Africa. There are a few different variations that I've seen. I had mine hot water curled after they were finished.


I kept these in for a good 6 months at least. You're still able to wash, condition, and style your hair with the twists in. Whenever I felt my scalp needed cleaned I washed the twists. I just concentrating on my scalp with the shampoo to make sure it was cleaned. The remainder of the twists I gently rubbed with shampoo, and made sure to rinse very well. Even though your hair is covered in this style you still need to make sure to keep your hair moisturized. A good leave in conditioner is very important. If your scalp gets dry, or itchy just massage oil such as tea tree into your scalp. Since there are so many twists I wasn't able to put my hair under a satin bonnet at night. Instead I'd pull the twists back in a loose pony tail then tie a satin scarf around my head.


More Style Ideas:
  • Pull the twists back into a low sitting bun; add a flower or hair piece for decoration
  • Use bobby pins to make a swooping bang and add a colorful headband
  • Wear a colorful scarf as a headband
  • Make one big French braid out of the twists

Once I removed the Senegalese twists I made sure to deep condition my hair and to use a protein pack. After your hair has been in a style like this you'll notice "a lot" of hair coming out with the twists. You shouldn't be alarmed though. Your head sheds hundreds of hairs a day. Do the math, if your hairs been in twists/braids for a month--that's at least 3000 hairs. If you've been washing and conditioning properly you shouldn't have anything to worry about.

~~~~~~~~~~~~~~~~~~~~~~~~~~~~~~

Pros:
  • It's a protective style that's low maintenance
  • Not limited to just one style
  • Helps ease the stress during transitioning
  • Easy styling in the mornings
  • Less manipulation on hair
  • Don't have to worry about frizz, humidity, rain

Cons:
  • Takes at least 6 hours to get done (depending on size) and just as long to remove (recruit a friend to help)
  • Can be pricey depending on where you go (may have to pay for service and packs of hair)
~~~~~~~~~~~~~~~~~~~~~~~~~~~~~~


Scrappy and I!!!


Over all I liked this style, and in general I love it. Would I get it again-- I'd have to be ready for it; psych myself up. The only turn off for me is the time it takes to get them in and out. This is the sole reason I refuse to do mini twists on my own hair. Even if I watch movies as I do it I'm just not motivated. I honestly don't want to sit for 6 hours while someone else does it let alone me doing them!

I'd recommend Senegalese twists, or any similar protective style to anyone who's teetering on going chemical free. Like I said before, styles like these really made a difference for me. There were plenty of days I was ready to give up and grab that box of relaxer, and be done. I actually gave in twice before sticking to my decision. If I got Senegalese twists done again, I'd probably get them a bigger size than in the pictures.


Sunday, September 25, 2011

Essential Oils

Recently I had the pleasure of trying and learning even more about essential oils (EO). I've had some people ask me questions about using essential oils, what they actually were, and their uses. Some answers were provided in a previous EO post H E R E !!  After doing more research, and from the help of doTERRA here's what I've found.

FACTS:
  • 50 to 70 times more powerful than herbs
  • 1 drop of peppermint essential oil = 28 cups of peppermint tea
  • Fight some viruses and bacteria

~~~~~~~~~~~~~~~~~~~~~~~~~~~~~~


There are 3 ways to use Essential Oils
  1. Aromatic-- Breath in or use a diffuser. Kills germs in the air, opens airways, affects moods
  2. Topical-- Applied to a specific area such as the head, ears, chest, back
  3. Internal-- Depends on the EO. Can relieve issues such in the throat and digestive system

~~~~~~~~~~~~~~~~~~~~~~~~~~~~~~ 

Some oils I own are: 

Grapefruit-- EO are gathered from the rinds of the fruit. The acid in grapefruit can help seal your hair after washings. Try doing a rinse with this and other citrus EO

Lemon-- EO are gathered from the rinds of the fruit. Diffusing this EO can help cleanse a room. With this and other citrus EO you have to be careful if applying topically, then going into the sun. The citrus can magnify the sun's rays and make your skin sensitive to it.

Ylang Ylang-- Often used as a perfume. It has calming properties and can be mixed with coconut oil for the hair. It can also be used as a dandruff treatment

Peppermint-- Often used as a breathing and digestive aid, which is why you find products such as gum, toothpaste, antacids, etc. in peppermint flavor. It also stimulates the scalp, blood circulation, and can be added to a shampoo, or conditioner for added benefits.

Lavender-- Can be diffused and used as a calming aid and can help you sleep peacefully. This EO is good for sensitive skin if used in a water mixture spray for hair. It's also a natural antimicrobial, so it'll help fight germs.

Rosemary-- Another EO used for its abilities to help digestive issues, muscle aches and pains. A rinse made with this EO is good for oily hair and dandruff


~~~~~~~~~~~~~~~~~~~~~~~~~~~~~~  


I've never thought about it before, but some EO can be used in food recipes too. The key is to make sure you check the contents of the EO you're using before ingesting it. Some EO out there can contain additives, so be mindful. A recipe I saw using EO was for salsa. Lime and cilantro EO were used in the recipe. I'm a big fan of salsa, so I'll probably try this out. You can find the recipe, and more information including spa treatments using EO  H E R E !! In case you didn't know I have another blog called Skinny Girls Can Throw Down Too, so be on the lookout for this recipe and more!!
 ~~~~~~~~~~~~~~~~~~~~~~~~~~~~~~  


 EO have an almost limitless amount of benefits and uses. Here are some for the head:


Dandruff can be helped with lavender, rosemary, and cypress EO
  • dilute the EO with water, massage into the scalp, then rinse after about an hour

Dehydrated Skin can benefit from lavender and geranium EO
  • apply topically to the affected area

Dry Skin can benefit from lemon, geranium, and chamomile EO
  • apply topically to the affected area

Eczema can benefit from geranium, thyme, and helichrysum EO
  • apply topically to the affected area as needed

Hair Loss can be helped with thyme, rosemary, and lavender
  • dilute 5 drops EO in a carrier oil (olive, jojoba, etc) and massage into scalp every night

Head Lice can be helped with lavender, lemon, and geranium EO
  • dilute and apply to entire scalp, shampoo, and rinse 30 mins later. Repeat daily for several days

Itchiness can benefit from oregano, lavender, and peppermint EO
  • apply topically to affected area as needed

Oily Hair can benefit from basil, thyme, and cypress EO
  • add to shampoo when washing hair

Psoriasis can benefit from melaleuca, roman chamomile, and helichrysum
  • apply topically to affected area a couple times a day

Sunburn can be helped with lavender, helichrysm, and melaleuca
  • apply gently to affected area


I'm usually the type of person who sticks to what they know, especially when the "know" is a good one, and works! The usual brand of EO that I buy is Aura Cacia. You can read more about the brand, and learn details on specific EO  H E R E !!  EO by Aura Cacia I usually see at natural food stores, health stores, or just about anywhere that sells organic items, or supplements. The price I usually see for a bottle is about $12.


A new brand I've recently tried and like is by I Heart doTERRA. You can keep up with the happenings of doTerra by following on Twitter @iheardoterra or by visiting the site  H E R E !! On the site you can also get a FREE sample of EO to try.


Have you tried and essential oils yet? Which brands, which kinds, how do you use them? Let me know!!

Friday, September 16, 2011

Quickie: Protective Style

Protective styles in the form of extensions were something I loved while my hair was transitioning. It took some of the anxiety I was having off of my shoulders. A simple but cute age appropriate style was OK in my book.


Simple corn rows

It took the stylist about 30 minutes to complete this style for me. With the ends down they reached just below my shoulders.


To switch up this style here are some ideas:

  • Twisted the hanging hair into a bun that was off centered at the nape of my neck
  • Add a hair flower just above my ear
  • Braid the hanging hair into one big braid
  • Make a pony tail that hangs over your shoulder

You can dress this hair style up by:

  • Adding chunk earrings with the hair pulled back
  • Add a big hair accessory, such as a flower
  • Make a pony tail using a decorative scarf
  • Form a head band out of a decorative scarf

To extend the life of this style:
  • At night put hair in loose pony tail, then cover with a satin bonnet or scarf
  • Washing your hair is still possible, just massage shampoo in between the braids, then air dry
  • If your scalp gets dry or itchy massage oil on it before bed
  • Sleep on a satin pillow case if there's no bonnet or scarf available

This protective style could've lasted a good month or more if I wanted it to. I'm particular when it comes to braids in my hair. These were removed after too much fuzzy hair was showing in the braids from me washing, and from normal wear.

To remove I cut a good majority of the hanging hair off. This made it easier for me to undo the braids. If you do this make sure not to go too high, so you don't chop off your own hair!! Afterwards be sure to deep condition your hair before styling again.

Naturally Meet: Toia

Toia is an AWESOME photographer I had the pleasure of meeting, and working with on multiple occasions!!!! I was drawn to her work, because she has no boundaries. Toia doesn't limit her work to rail thin, salon perfect hair wearing, flawless skinned, 6'8" models. Her spectrum and mind are much more open than that. She is very true to herself, her work, and life. I love that in her! Even though she's been SUPER busy she managed to help me out by answering some questions, and providing great info for me to pass on. Here's your turn to Naturally Meet, Miss Toia!

When did you become natural? May of 2006 was my last relaxer.

Did you transition, or do the Big Chop? I transitioned first and then did my big chop on January 26, 2007 after watching Malcolm X.

What influenced you to become natural? I admired the uniqueness of being natural. I had tried to transition for five years before I actually went natural. Then, I met a local photographer who traveled all over the world taking images of beautiful people in Africa, Asia and the Middle East. I saw one image of a girl with really strong African Features. She was from West Africa. I thought she was not attractive, and I wondered what made him choose her to be photographed. He told me that he thought she was beautiful. I felt a bit guilty, because I realized as old as I was that I had been taught to hate those features that are unique to Africans and African Americans. It was self hate. I felt ashamed. I kept looking at the image, and I realized that I shared the same features (wide nose and full lips), but that I was somewhat of a hypocrite, because I hid mine behind a long silky wrap of chemically relaxed hair. I decided at that moment to go natural and to stand firm in my decision this time

What's the best thing about being natural? The cost! Economically, it is cheaper (besides experimenting with different products on my hair). I no longer have to spend 65 dollars for a relaxer. Also, I do not miss sitting in a chair for hours on end. I'm so glad that's not me anymore! 

Top 3 fave products? Carol's Daughter Hair Milk, Hello Hydration Moisturizing Conditioner, and Apple Cider Vinegar.

What's your hair routine? In the summer, I wash with an apple cider vinegar rinse in the shower. I then use a cheap conditioner to comb through to detangle. After that, I rinse thoroughly and then apply either the hair milk OR the conditioner (depending how my funds are). I never comb it after detangling. I allow it to dry with the product on, in ringlets. In the mornings, I shower and allow the mist to spray my hair and I may apply a little more product as needed. In the winter, I have my hair wish, blow dried and flat ironed professionally, or sometimes I do it at home.

What do you love the most about being natural? I love the versatility and my hair seems so much healthier. It's growing like a wild fire!  


More Information provided by Toia:

~~~~If you're interested in learning more about the Apple Cider Vinegar Rinse  H E R E !!  is a helpful how-to video.

~~~~Want to learn how to condition your hair like Toia described above? Watch this how-to video H E R E !! This is what Toia had to say about it:

"I also condition and comb my hair through in the shower. After doing this, I NEVER comb my hair again. I put the next product in and let it dry in ringlets. That's if I'm doing the conditioner only. In this video, the girl uses a plastic brush to define her curls, but I don't like it. It makes my hair too flat, so I just let it air dry with conditioner after conditioning in the shower. I use a cheap conditioner in the shower and rinse it out. I use a heavier one after showering and let it air dry with the conditioner in it."


~~~~I myself have used the Conditioner Only Method. You can find more information on how to do this H E R E !! This site shows you the results of this method on different hair types.  


~~~~~~~~~~~~~~~~~~~~~~~~~~~~~~ 

Helpful links for networking, videos, and more hair information:


The following are some photos of me that Toia has skillfully taken! Remember these photos are protected, copyrighted, and permission for any and all use must strictly have permission from Toia herself.


Wearing a Twist Out

Two Strand Flat Twists on the side with loose two strand twists in the back

Small two strand twists


 You may find more about the wonderful Toia, her craft, and maybe a photo or two of me    H E R E !!


Monday, September 5, 2011

Product Quickie

There are so many stores that sell hundreds of products. What's the best store to buy hair products at--I'm not sure. It depends on what you're looking for and your budget. A lot of products I use, or try, I find randomly. I might be at the store for socks, and see there's clearance shelves full of conditioner, and there it is! I'll show you some products that I use, describe them, tell where I found them, and how much.


I've used Eco Styler gel for some time now. Just recently was the variation with Argan Oil was discovered by me. Eco Styler with olive oil was the version that I was familiar with. It was mostly used to smooth down the edges of my hair, for flat twists, and wash n go's. Notice the difference in size of these two containers.

Eco Styler Argan Oil Gel:
  • Bought at Sally's Beauty Supply
  • 32 ounces
  • Cost about $8
  •  Alcohol Free
  • 100% Pure Argan Oil
  • My uses: wash n go's, edge smoother, flat twists
Eco Styler Olive Oil Gel:
  • Bought at Dollar General Store
  • 16 ounces
  • Cost about $5
  • Alcohol Free
  • 100% Pure Olive Oil
  • My uses: wash n go's, edge smoother, flat twists

My favorite way to do wash n go's, and probably the easiest, is to simply use conditioner. If I'm in a hurry, or know that I'll be doing my hair later in the day, I'll use a cheap conditioner. Conditioner is the easiest and quickest way to define my curls after washing/wetting it. I choose a cheap one, because I can afford to use a ton of it at a time. If I pay $15 for conditioner it's not going to be used up in one day--just saying. Suave Naturals is my go to cheap conditioner for quick wash n go's! I like the smell of coconut, so Tropical Coconut is the scent I choose.


Suave Naturals: Tropical Coconut
  • Bought at: Dollar General Store
  • 15 ounces
  • Cost $1
  • Water based
  • Contains honey, rosemary, and coconut extract
  • My uses: wash n go's

Lustrasilk is great for deep conditioning. This helped me a lot while I was transitioning! Your hair feels soft, smells great, and is easily detangled after using this. There are a few different kinds out there, but these are the two that I use the most. I see these often at just about any store I go to that sell hair products. The only difference, like with the Eco Styler, is probably the price. After washing my hair I use a couple of hand fulls of this, and soak my hair, then cover with a shower cap for at least 30 mins before rinsing.


Lustrasilk Tea Tree- liquid cholesterol (blue):
  • Bought at: local hair store
  • 20 ounces
  • Cost: about $5
  • Contains vitamin E, tea tree oil, soybean oil, safflower oil, peanut oil, rosehips extract
  • Great for dry, itchy scalp
  • My uses: deep conditioning, wash n go's
Lustasilk Herbal- cholesterol (orange):
  • Bought at: local hair store
  • 20 ounces
  • Cost: about $5
  • Contains carrot oil, rosemary oil, sage
  • Great for damaged, relaxed, and chemically treated hair
  • My uses: deep conditioning

I try to keep an eye out for clearance bins of random products. When products are super cheap it's a great time to buy and try! Even travel sizes are cool if you're curious about something, but don't want to spend the money on the full bottle. Walmart usually has a clearance isle. I've found tons of hair products, tools, accessories there before. I'll keep you posted if I find a good haul!

Do you have any products to add to the list? Know of any places for hair products? Comment below ^_~"

Don't forget to subscribe! You can now subscribe via email...just type it in the box up in the top left corner and hit "submit".

Tuesday, August 30, 2011

Essential Oils (EO)

The essence of plants can be collected in a few different ways, but the end result is always the essential oil of the plant. Essential oil's (EO) smell good and can also be good for you in a number of ways. I like to use them to make bath salts for myself, and gifts for friends. EO gets used as a hair product by me too. Commercially you can find EO's in perfumes, makeup, soaps, scented cleaning products, incense, and aromatherapy products.

~~~~~~~~~~~~~~~~~~~~~~~~~~~~~~

There are 3 ways that EO is gathered from plants:

1- Distillation: Flowers, leaves, wood, bark, roots, seeds, peel all can be used for this process. Most EO's are made this way.

2- Expression: Flowers (leaves, wood, etc.) are pressed, and processed like olives are for olive oil, then collected.

3- Solvent extraction: Method used when flowers (leaves, wood, etc.) are too delicate for distillation or expression. As suggested, a solvent like alcohol is used in the process. Alcohol easily evaporates leaving behind the extracted oil. Supercritical carbon dioxide is used in this method too. This is how decaf coffee is made.

~~~~~~~~~~~~~~~~~~~~~~~~~~~~~~

There are TONS of essential oils for sale out there. Some that I see more frequently than others are:

Lavender- This is probable my favorite EO. It can help asthma, be used as a bug repellent, relieve headaches, and help sooth the scalp.

Myrrh- Can help itchy and chapped skin

Cinnamon- I LOVE cinnamon. I don't use the oil, but the sticks and power I use in abundance. It helps with headaches, stress, and can be added to tea to help sore throats and coughs.

Patchouli- Used to treat dry scalp in oily hair and for chapped skin

Rose- Can be added to shampoo and help with hair loss. It can also be massaged into the scalp for the same benefits.

Frankincense- Helps stop dry scalp

Sandalwood- Great anti-inflammatory and anticeptic

Tea Tree- Another fav of mine! It can help with acne, itchy skin, and dandruff.

Jasmine- Great for sensitive skin that's dry

Vanilla- Used mostly for its sweet scent

Chamomile- This one is very useful, but you should be careful with it. Some people can have allergies or sensitivities to the flower. Even chamomile tea can have this effect. It helps damaged cells from the sun, and can be useful against flakes from psoriasis.

***Tips on buying EO***

~Beware of words such as therapeutic grade, fragrance oils, perfume oil, nature oil, and/or aromatherapy oil. These aren't pure EO's, usually have additives, and other chemicals mixed in.

~The bottle EO comes in should be a dark amber (sometimes blue or other dark shade) colored glass. This helps filter and control the amount of sunlight that can enter the bottle. Heat and direct light can damage the oil and degrade it. The bottles are usually very small, containing only a few ounces. Some oils can deteriorate plastic, and contaminate the oil itself. This is also true for rubber, so avoid bottles that have a rubber dropper for the top.

~Certified organic EO's are very good, but I find are hard to find. As with all things organic they're chemical/pesticide free, which is always a plus.


Uses for Essential Oil:

Conditioner- Take 1 tablespoon of jojoba oil and mix with 3 drops of Lavender EO
  • After washing hair with warm water, massage the mixture into your hair. Concentrate on your scalp and the ends of your hair. Leave on for about 20 mins (wearing a shower cap or towel), rinse well, and continue as usual.
  • Helps fight dry scalp and hair
  • An alternative to jojoba oil could be olive oil, or tea tree oil. The amount of base oil can be modified to your needs, but EO goes a long way so you won't need many more drops of it
  • The Lavender EO can be substituted with any EO you enjoy for a different scent
Air Freshener- Use a few drops in an oil heater to scent the room
  • An alternative is to heat water on the stove (in a pot you're not using for food) on low. Add a few drops of EO and let the steam scent the room. Don't leave it unattended or on while you sleep. Be mindful of the water level too
  • Try different EO's for their therapeutic properties and just relax
Bath Salts- A mixture of EO and sea salts can be used to make bath salts. These are SO relaxing!!
  • The salts and oils will help condition and soften your skin
  • It can also be used as an exfoliate for feet or hands
  • Again, you can substitute Lavender EO for any of your choosing

Here is a batch of bath salts that I made using Lavender EO. I used a seashell for decoration and as a scooper! As soon as I open the jar the bathroom fills with the lavender scent. I love it!! I've made salts with vanilla, and cherry also. All have been successes.

Bug Repellent- I mostly use this for my dog, Scrappy.
  • Heart worms and other illnesses can be transmitted by mosquito's, fleas, and ticks. I'm not one for creepy crawlies, so anything safe to keep them, and their disease away I'm for.
  • In a handy water bottle I put warm water (for Scraps comfort) and a few drops of my trusty Lavender Essential Oil!
  • Spray on Scrap and hes bug free and smells good. My house does too when he runs around it, because I'm squirting him!
  • You can also spray it lightly on your pets bed, or spots it lays in a lot to help keep fleas and critters away
Body Mist- Oil can help condition your skin after a shower or bath.
  • Using the water and EO mixture, lightly spray yourself after a shower and let your skin absorb the oil.
  • You'll smell good and your skin will love you!
  • The Lavender Essential Oil can be substituted for any EO that you enjoy.
Hair Refresher- Your water bottle will be your bff soon, if you couldn't tell!
  •  When you wake up, or just to freshen up during the day you can spritz your hair with the EO/water mixture instead of plain water
  • Leaves a light fresh scent
I'm always experimenting and am sure this list will grow. There are endless ways to use essential oils. Do research and find some you like, or qualities you'd like to explore. Don't let the price tag scare you!! Can't forget to mention that. The bottles of EO are small, and the price tag that I usually see is around $12. This depends on the EO though!! Oils such as lemon or orange will be cheaper, because there's a lot of peel with oil to extract from. Other EO's will be more pricey, because it's harder to extract the EO from the plant. Often times companies will let you buy a sample size for cheap. This is a good way to try out different oils and find what you like!

Are there any EO's that I didn't list that you like? Do you have different uses for EO's? Post them below!!

Saturday, May 28, 2011

Dry Conditions

After my last posting I was asked about hair remaining super dry no matter what's tried. I knew exactly what they were talking about. There were times, especially when I was transitioning, that no matter if I dunked my head in water it would be dry! This was very discouraging and frustrating for me. If you have a good stylist who knows about textured hair they can be a great resource to managing your hair.

Weekly visits to the salon can become very costly and time consuming. So, through trial and error I've come up with my own solutions to this problem. Eating right, drinking plenty of water, covering your hair at night, not spending too much time in direct sun, avoiding products with a high alcohol content, using high heat as least as possible--these are a few ways to gain a healthy scalp and head of hair.

Deep conditioning packs!! About $2 each!

Olive oil and argan oil have been to my rescue many a time! I'm not sure if they're hidden secrets or what, but I don't really hear much about either product in general. When I hear oil and hair they don't seem to go together. Greasy hair is the last thing you want if you're goal is to maintain healthy hair. Trying random products out and doing a little research I've learned a thing or two. If you're like I was here's a little info on both:
Argan Oil
  • Comes from the seed of an endangered fruiting tree found in northern Africa that's high in vitamin E and essential fatty acids
  • Can be used in foods, for dry and dull hair, brittle nails, skin problems such as wrinkles, stretch marks, acne and eczema
  • Natural antioxidant, so it helps lock in moisture, repair damaged hair, maintain healthier roots and scalp
Olive Oil
  • Originally from Asia, pitted olives are pressed to retrieve the oil
  • Contains both vitamin E and essential fatty acids, which are vital to healthy skin and hair
  • Can be used in food, treating ear aches, digestion issues (such as constipation and indigestion) and to combat dry skin and hair
~~~~~~~~~~~~~~~~~~~~~~~~~~~~~~~~~~~~~~~~~~~~~~~
As always, I started the process with freshly washed hair and a clean scalp. Since I was planning on straightening my hair I didn't want to add more stress to it than necessary. I used a detangling shampoo with tingling peppermint oil. Smells SO good and your hair/scalp feels really nice after wards!

Next, I used the Olive Oil Replenishing Pak that's in the first picture. After gently towel drying my hair I SOAKED it in this conditioner. There's a lot of product in that little pack, but I used it all. 
 
To make sure the product was distributed evenly I used my shower comb to detangle my hair. With the olive oil conditioner in still, I parted my hair into four braided sections so it would be easier to rinse and keep untangled.
Nothing fancy, just 4 sections

Side note:
In theory, knowing your hair type could help you in knowing how to work with your hair. I honestly have no clue what my hair type it besides a "do what it wants to do" type. 4B, Type 3..sounds like a game of bingo. Might just add this to my research list and get back to ya on it!
If you know hair types maybe you can help me out?
 
After I got done with sectioning my hair I put a shower cap on. The longer you keep it on the better, but I had some things to do so I kept it on for about 20 mins before rinsing. 
 
Tip: If you do a conditioning pack in the evening, and will be in for the night, you can try this. Wash your hair and condition as explained here, but instead of rinsing, keep the shower cap on. Add a bonnet or scarf on top of the shower cap to keep it in place. You can continue with your normal activities; including sleep. Keep the scarf and cap on while you sleep. The shower cap will keep the moisture trapped, so your hair doesn't dry out during the night. The scarf/bonnet will keep the cap from coming off while you sleep. In the morning rinse and continue the steps like usual. This deep conditioning method is great for wash and goes too!
 
Whenever I rinse my hair I use low pressure and lukewarm water. Hot water can strip your hair of its needed oils, and cold..well I just don't like being cold but it helps seal your hairs cuticle. 
 
The braids were left in while rinsing the conditioner out. I squeezed the sections to make sure all of the product was out--rinsed for about 3 minutes. 

Working one section at a time I blow dried my hair, pinned it out the way and moved onto the next. Since the hair was detangled when the conditioner was applied it doesn't need it again. This is a plus to rinsing with the sections in tact. After my whole head's dried I took small sections out of a pony tail to begin flat ironing.
Helps split ends and breakage that can occur from styling

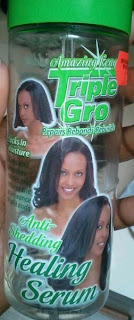
A little Healing Serum was applied to the sections before flat ironing, focusing on the ends. The ends of hair tend to be the driest, most vulnerable to heat, everyday wear and prone to breakage. This product adds shine, and a protective layer to seal your hair and keep it from breaking. It also smells good! One tip with this product is a little goes a long way, don't over do it! It's always easier to add more than to take away when it comes to hair products.

Tip: When it comes to flat ironing hair smaller is better. Most people want to get it over asap and work in chunky sections to achieve this. I don't want to be doing touch ups often, or having wavy roots after all of this. Taking small, thin sections to iron out, may take more time, but the end result looks better and lasts longer.

Hair after flat ironing! It's grown since getting it cut a couple months ago!!
Before I decided I was going to straighten my hair I checked the weather. If it's raining, going to rain, be foggy, a chance of rain, humid--in other words any type of moisture in the air--I'm not straightening my hair. Right after spending all this time on my hair I walk my dog, Scrappy, and of course I get hit with some sprinkles. Funny how that happens o___O
 

As I mentioned before, I had some business to take care of  ^_^'  Dealing with the weather wasn't going to be one of them. I wrapped my hair and put a scarf on. Nice and simple. Chunky earrings, and a tie on the side to dress it up a little and I'm out the door!
 
-_________-        It didn't end up raining after all, but I still looked cute!

This is one of a few ways I've found to keep my hair from being overly dry. 
 
Know of other ways to keep your hair moisturized, conditioned, and/or healthy? Let me know!!