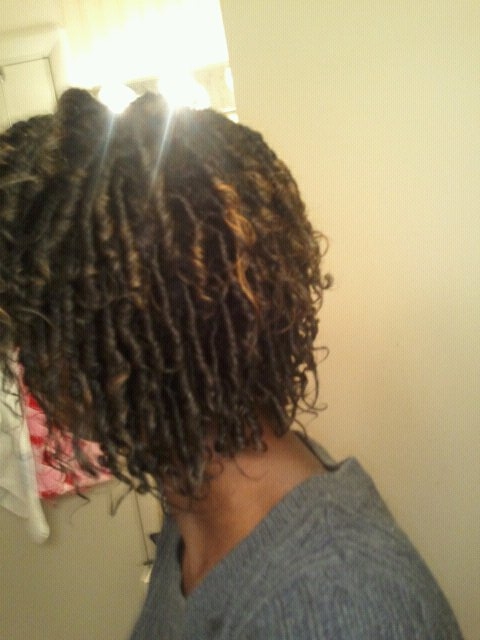
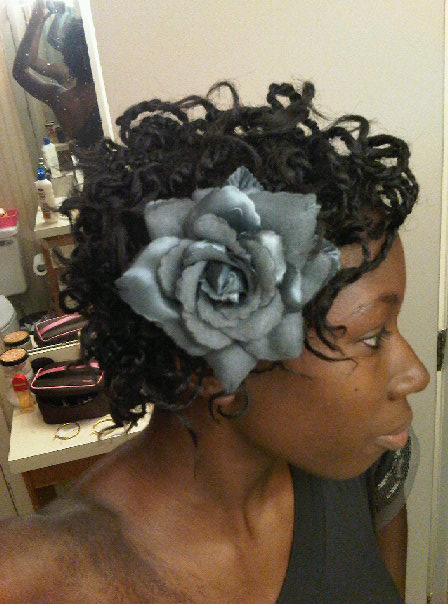
Showing posts with label Twist Out. Show all posts

Friday, April 20, 2012

Step by Step: Hawk Variation

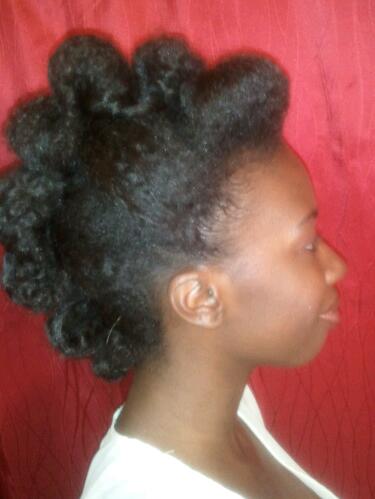
After wearing my hair in a twist out for a while I needed to wash and style it for Easter, but was short on time. Instead I thought of an easy style to get me through the day until I could wash my hair that night. The end result of this style looks like a mohawk made of puffs.

Tools I used: Shea butter mixture, 3 rubber bands, 7 standard sized protected bobby pins, 1 large protected bobby pin, and hair pins (number may vary)


I didn't want to manipulate my hair too much so I didn't use a comb. To begin I smoothed on my shea butter mixture to moisturize my hair and to give it a shine. Next I sectioned my hair into 4 sections making the biggest in the front of my head.


(Right) The red shows where a rubber band is used. The brown shows where rough parts were made.

Tip: If you part your hair using a comb you'll be able to see the parts easier in the finished product. If you use your hands/fingers to section your hair there won't be parts showing in the finished style.

 ~~~~~~~~~~

The very first hump in a basic pompadour secured with one large bobby pin. Once that's completed I moved on to the next pony tail in line. The hair is roughly divided into two parts, rolled, and then secured with a standard bobby pin.

 (Right) The red shows how the pony tail is roughly divided into two parts. The brown shows where the rubber band is securing the ponytail.

Tip: The rubber bands don't have to be very tight, or to pull your hair uncomfortably in any way. The sections that are pinned don't have to be exactly the same size either.

~~~~~~~~~~

After your first section is finished it should look similar to this:

 (Right) The brown shows the direction the hair was rolled. Yellow shows where a bobby pin was placed and red shows the rubber band that was used.

Tip: You can see that the pompadour was bobby pinned in two places since the section was so large. I made the next section's rolls large enough to touch and blend with the roll next to it. You won't notice the rubber bands once the rolls are done.

~~~~~~~~~~

Continue to roll and pin for the remaining pony tails.


Tip: When you section your hair, if you make the sections smaller as you go towards the back of your head the puffs will appear to cascade down your head ^_~" Also, when securing with the standard bobby pins, place one pin on each side of the roll. This will help minimize the amount of bobby pins needed.

~~~~~~~~~~

The last step when all of the rolls are pinned is to just clean up any stray hairs, curls, or make the puffs tighter with the hair pins. Since I started this with hair that had been previously twisted I had random strays all over the place.

After pinning everything how I liked here is the result:


Follow & Tweet me @MzDezy

 ~~~~~~~~~~

Night Care: Since this style is so simple to do I take it down completely and cover with a satin bonnet before bed. In the morning I sprits with my EO water mixture, smooth and restyle.


This hawk variation, puff hawk --- what would you call it?? --- has many pros:
  • Can be worn by people with different hair lengths
  • The number of puffs can be changed very easily to switch up the style
  • People who are transitioning can wear this style
  • Doesn't take a lot of time to style
  • Easy style for people of all skill levels to achieve
  • Can serve as a protective style since the ends of your hair are covered
~~~~~~~~~~

I encourage you to try this style!! If you do make sure you post it on the Facebook Fan Page, so that it may be added to the "Hair I Did" album for others to see! You're welcome to post any and all natural hair pictures of styles you've created or styles that inspire you in some way!

Thursday, November 10, 2011

Style Quickie: Fro Hawks!

Fro hawks are super easy to wear, fast to style, and very cute! Love them!! There was a time where all I'd wear were fro hawks. I like them, because you're able to dress them up, or wear them casually. I'm also able to have my curls and big hair; both which I love ^_~"  I also like wearing one half of my hair pulled back....half fro hawk??

Things I use to style: wide tooth comb, essential oil (EO) water mix, conditioner, bobby pins, rollers (sometimes), and hair flowers

Old styles such as twist outs, braid out, knot outs, wash n go's, blowout's, etc. can all be easily turned into a fro hawk....or half fro hawk <~~~ I need a name for this; help me out!


Hawks from Wash n Go's

Fresh highlights done @ a N.E.R.D. concert

Big hair!! @ a Common concert

Wash n go with conditioner only


Photo by: Anne Inez Photography


Hawk from a Twist Out


Other Hawks

Old Roller Set


Use flat twists/braids to protect your sides


You can get away with a fro hawk if you're transitioning by flat twisting or braiding the sides, then roller setting the ends. I wouldn't recommend wearing a fro hawk that's loose for too long. The longer you wear it the more chance there is for your hair to tangle. You don't want to risk damaging or losing any hair. If the style is a protective one using set curls, two strand twists, or braids, then it could be worn for a longer amount of time. Fro hawks are a style that can be worn with just about any length of hair. They're super easy to do, and there are many ways to style them.

Yay or nay for fro hawks?? How do you wear/style yours? Show me!!

~~~~~ Don't forget to Like A Natural Hair Affair on Facebook ~~~~~

Wednesday, November 2, 2011

Quick Style: Wash n Go

Here's one method of how I do a quick, simple wash n go! This took a max of 10 minutes to complete, if that.

Things needed:

Wide tooth comb
Conditioner
Spray bottle
Essential oil (EO) of your choice
Towel (optional)


~~~~~~~~~~
To Make an EO Mix: I use a spray bottle that's easy to control and hold in one hand. Fill it with warm water, then (depending on the size) add about 3 drops of lavender EO, and give it a quick shake.
~~~~~~~~~~

 
I try to never comb my hair while dry, because it rips, tears, and risks damaging it. Detangling almost always takes place while I'm washing my hair, and it's covered in conditioner. Detangling while conditioner is on your hair helps lubricate and protect the strands. Conditioner also smoothes the cuticle making it harder for strands to catch, tangle, or pull while combing.

To begin I soak my entire head (using warm, not hot, water) and rinse until the water runs clear. I do this to make sure any product that may be in is rinsed out. Next, I co wash (cleanse hair/scalp using conditioner instead of shampoo) rinse again, then squeeze (not twist) excess water out. After rinsing I soak my hair in conditioner, making sure all sections are covered evenly.


Soaked in conditioner!!

~~~~~~~~~~

Once the conditioner's in I spray down my entire head very well with the EO mixture. To prevent product build up you want about half of the conditioner to be diluted. When the EO mix is in I massage it around for a few seconds, and then detangle using a wide tooth comb. I start around the edges and ends of my hair, and then work my way closer to the crown and roots. If necessary I hold sections of hair so that strands aren't pulled or ripped out in the process. The wide tooth comb helps in the detangling, and it help define curls without manipulating them too much. If you twist, pull, or rub curly hair while it's wet (or in the drying process) you can cause unwanted frizz. This is why I don't use a towel for wash n go's, but if you choose to be gentle!

Just a little conditioner left after the EO mix spray down and detangling!

~~~~~~~~~~

****This is all done on the side of my tub and/or holding my head upside down (let gravity help you) ****

~~~~~~~~~~

Ignore the brows 0_o I was trying to get them together while doing my hair and I need an outline to help  ^_^"
Notice the definition on my curls!! I love it!

Tadaaa...hair and brows done in about 10 minutes! You can move your hair around to where you'd like it to be when dry. Try not to manipulate it too much so that you may prevent frizz.
~~~~~~~~~~

Pros to Wash n Go's:
  • Low maintenance- to refresh in the mornings just spritz with the EO mix and fluff
  • Moisture (water) gets sealed in your hair by the oils in the EO mix
  • You're helping your hair maintain its flexibility by keeping it moistened and conditioned
  • Time needed for styling is minimal
  • Can be done with cheap/expensive product
  • Conditioner coats the cuticle adding protection to the hair
  • Protein conditioners strengthen hair from the inside out
  • Conditioner help define and give a slight hold to curl patterns in hair without gel
~~~~~~~~~~

Want More Info on Essential Oils? View some of my older posts!!


Want to see another wash n go method?

~~~~~~~~~~

Quick Tips:

***Using the above method you can turn an old twist/braid/knot out into a quick wash n go. This is helpful when you just have to do something to your hair but are short on time!

***Jazz up a wash n go by adding an accessory such as: hair flower, clips, colorful head band, or a fancy scarf.

***If you have different hair/scalp needs experiment with different EO mixes to help. Example: if you have oily hair, or dandruff you may want to try a Rosemary EO mix.

***I don't recommend this style for someone who's transitioning. Unless you have very little relaxed ends remaining it may not look the best if long pieces remain straight.

~~~~~~~~~~

I'd like to thank everyone who submitted an entry for my 1st Giveaway!! All of the entries were VERY good and creative...I loved them! I'll be announcing the winner soon! Be on the look out for more Giveaways.

I also want to welcome, and thank everyone who's joined/liked A Natural Hair Affair on Facebook, have followed my blog, and watched my YouTube videos! I appreciate all of the questions, feedback, emails...everything! I love talking to new people, learning and exchanging info! Keep it coming ^_~"

~~~~~~~~~~

Sunday, October 16, 2011

Twist Out Update

As promised here are updates of my twist out. This style originally started as two strand flat twists. I had intended on wearing those over night, then wearing a twist out the following day. When I woke up it was raining, so a hair detour was taken. You can read more about that  H E R E!!


Before taking my twists down I put tea tree oil on the parts in between the twists. Besides a little tea tree oil on my scalp no other products were used.


I know I've said it a few times, but I'm going to say it again ^_^"  I am in love with my hair color!!!! Notice how shiny it is. It's also super soft, and manageable. I blame the henna ^_^" Love it!!


If you noticed, when I had the two strand flat twists in I tucked the ends under before pinning. This gives the ends of my hair more curl when I wear the twist out. It also makes a tighter, shorter curl. I'm on day 3 of my twist out, and over time the curls have loosened. 

The right side actually looks longer than the left side right now. My right side has a few curls that are hanging past my shoulder. This is caused by me making the flat twists on the left tighter than the right. The asymmetrical appearance of the curls doesn't bother me. If it's a concern for you, then I'd suggest trying to make the flat twists more uniform initially.

At night I haven't been covering my hair since wearing the twist out. I sleep on a satin pillow case, so my hair doesn't dry out. In the mornings I fluff my hair, and arrange it how I want. Usually some type of hair accessory is added to the from of my head. Above you can see the hair feather I added the first day.

Pros of this Style:

  • It transforms over the days you wear it. This minimizes the manipulation on your hair.
  • The two strand flat twists are a great protective style that can be worn casually, or dressed up with accessories.
  • You can achieve curls without harmful heating tools
  • This style can be worn on most hair lengths. If you can two strand flat twist your hair you can rock this.
  • It's very quick to style. The flat twists took me 10 minutes tops to complete.
  • Two strand flat twists can easily be worn in moisture filled environments. Rain, sweat, and humidity aren't an issue. 
  • It's a great style to wear while working out! It's protected, styled, and out of the way.

Have you tried this style before? What were your thoughts on it?? Share!

Wednesday, September 28, 2011

Quickie: Two Strand Twists for Men

I love two strand twists!!! Love them, love them, LOVE them. They're not just for the ladies though, men can wear them too! The process for the twists is the same for males and females. One difference that I do make when doing two strands on guys is the size and position of them. Most guys don't want a bang of twists for example. When I do other people's hair I take a little more care than when I do my own to make sure it's the best, it'll last, and that they come back.


I always start the two strands in the back at the nape of the neck and work my way forward. When doing guys hair I don't work in quarters, instead I work in rows if that makes sense. So, starting in the very back I part a row of hair to twist, and clip the rest of the hair up, and out of the way. If the hair's dry, I spray it; add product, and then twist. When the row is done I part a new one and repeat. The twists closest to the neck are small so that they hold and won't come undone from shirts, coats, or anything rubbing. Hair around the edges of the head and near the front generally are small too. The section in the middle, on guys, I typically twist a little bigger than I would on myself.


~~~~~~~~~~~~~~~~~~~~~~~~~~~~~~

What I Used:
  • Wide toothed comb
  • Hair clips
  • Spray bottle (water, lavender EO mix)
  • Eco Styler Argon Oil Gel
~~~~~~~~~~~~~~~~~~~~~~~~~~~~~~


You're able to wash your hair still while wearing two strands. If your scalp isn't too dirty you can co-wash -- meaning cleanse your scalp using conditioner to get rid of dirt and product without the 'poo (shampoo that is). Two strands can last as long as you're willing to let them, or maintain them. A second style for the fellas, undo the two strands and wear a twist out. At night you should protect your hair by wearing some type of satin cap, and/or sleeping on a satin pillow case. I don't know many men who own, or at least admit to owning, satin cases, so the head cap will work  ^_~"

Saturday, September 17, 2011

Quickie: Poof

The poof, or puff, is definitely one of my favorite ways to wear my hair. I like them simply because they're easy to do, can be worn causally or dressed up. You can make a puff from an old twist out, blow out, braid out, wash n go, and more. It's a style that can be worn in many many different ways!!

This morning's go around with the poof was a simple 2 minute style. I had an appointment to get to that I was running late for. Only a couple of things were needed for this. They include:

  1. A hair ribbon
  2. Spray bottle (I let the shower mist my hair instead)
  3. Accessories (optional)


Just woke up and am in a hurry!! This is an old blow out that I was using. Note the black hair ribbon around my neck.

Making sure the ribbon is even I tie it around my head once, then adjust if necessary.
Here you can see how it's tied. It's like you tie the laces on your shoes before you make the bunny ears ^_^"  Make sure you don't make this first tie too tight!! You don't want to give yourself a headache or cause tension on your hairline.
Bringing the hanging  pieces of ribbon around the back of my head the same tie is repeated. Again, make sure you don't tie it too tight!! This is where you can decide on the position and size of your poof. If you want it smaller pull the ribbon more towards the center of your head. If you want it bigger leave the ribbon closer to the edges of your head.


****After you make 1 tie in front, and 1 tie in back you are able to adjust the poof if you choose to. At this time you can also loosen, or tighten the ribbon.****


My hair ribbon's long so 1 more tie in the front will do for this style. It's not necessary to tie this last one tight, because the poof is secured already from the first two. This last tie is really done to get the excess out of the way.

There ya have it!! A poof! I tied the ends of the hair ribbon into a bow. If you'd like you can tuck them into the pieces that are wrapped around your head to hide the ends. My poof looks on the small side here, but believe me there wasn't anything small about it.
I actually redid my poof to tame the size down a little. Here's a side shot!!


Extras You Can Try:
  • If you'd like your edges smooth- before even adding the ribbon smooth a little product on your edges and smooth with a brush
  • To jazz up your poof- try adding a hair flower in the front near your ear
  • Add fancy chop sticks to the side of your poof
  • To add color- use a decorative ribbon instead of a black one like I did
  • Add a cool headband to the front for a different look
  • If your hair's dried out- mist it with an essential oil-water mixture before styling

When taking pictures for this I noticed my hair color. I recently henna'd my hair for the first time. When it was wet I could easily see the color different, but after it dried not so much. At least I couldn't see it--others said they could. I like it, there will be posts on that project coming soon. Subscribe so you can keep in touch  ^_~"

Wednesday, August 10, 2011

Myspace, afros, twists...and More!!

Not too long ago for some super random, strange reason, I remembered Myspace! Forgot ALL about that website, and me having a long lost profile on it. With some playing around of email-password combos I was able to login. Boy oh boy was I entertained for about 15 minutes! On my profile are a ton of pictures that go back a few years.

One of the things that stood out to me was how my hair has changed over time and how often. I rediscovered pictures of me with a relaxer, during my FIRST try at transitioning, after my BC (big chop), with braid extensions, with hair tracks, etc. It took me about three tries before I actually stuck with being chemical-free. Saying no to a relaxer was definitely not the easiest thing I've done. Now, there's no turning back for me =^_^= Enjoy!


My first couple attempts at transitioning:


I remember this hurting SO much to comb!! I had no clue how to manage my transitioning hair. That ultimately sent me back to a relaxer.
 
At the beginning I found it easier to maintain my do' by blow drying and straightening it. I do NOT suggest that if your ultimate goal is to have healthier hair!


~~~~~~~~~~~~~~~~~~~~~~~~~~~~~~


Love roller-sets!! If I had a hooded drier I'd wear them more often.

Reasons I like Roller-Sets:
  • It's a SET style, so it'll last longer than a style usually would
  • You can set your hair by air drying
  • Even though your hair's "set" there's still versatility in styles you can wear
  • If you do visit a salon they're usually very inexpensive to get


Comb twists (coils), or finger twists is another great style! A different look with similar pros of roller-set styles.
 ~~~~~~~~~~~~~~~~~~~~~~~~~~~~~~

Protective Styles:


Two Strand Twists curled with rollers

Single Braid extensions that a friend did for me back in the dorm days

Corn Row Braids with hair extensions. The hanging braids can be twisted into a bun at the neck for a different look.

Christmas with Scrappy!!!
Senegalese Twists with hair extensions that were curled with hot water


Pros of Protective Styles:
  • They help minimize breakage that your hair might incur from daily wear
  • Usually can be worn for a long period of time
  • With braid extensions I was still able to wash/condition my hair regularly
  • Easier to just "get up and go"
~~~~~~~~~~~~~~~~~~~~~~~~~~~~~~
The last point mentioned might be one of my favs! I like to just get up and go...get as many winks in as I can . This is why wash and go's are at the top of my list for hairstyles!


My 24th bday party I believe


NERD Concert!!!!!!

Wash n Go Fro


Side View

Front Row of a N*E*R*D  concert


A very spontaneous shot! Was helping a photog out at an event.


Night out with my girl! Good times!!

Big bro and I!! Wash and go with short locs.
For the most part, wash and go's are preferred by me, because of what they simply are. In and out, but still looking good! There are a number of different ways that I go about doing my wash and go's.

Keep an eye out for that posting and others in the near future!  ^_~"   Don't forget to follow me for updates. I also LOVE feedback, thoughts, advice, etc., so keep it coming and thank you!!! *MUAH*